
Tail Light Repair DIY Guide
DISCLAIMER
As always, follow all safety protocols. Don't undertake this task if you aren't comfortable with it, fully understand it, and are capable of completing it. The information provided may be incomplete or inaccurate. You are ultimately responsible for anything you do. Neither Redpants, LLC or myself is responsible or liable for anything that may occur.
Repairs are not guaranteed to be successful. A tail light may require additional products, supplies, and/or work than detailed in this DIY Guide.
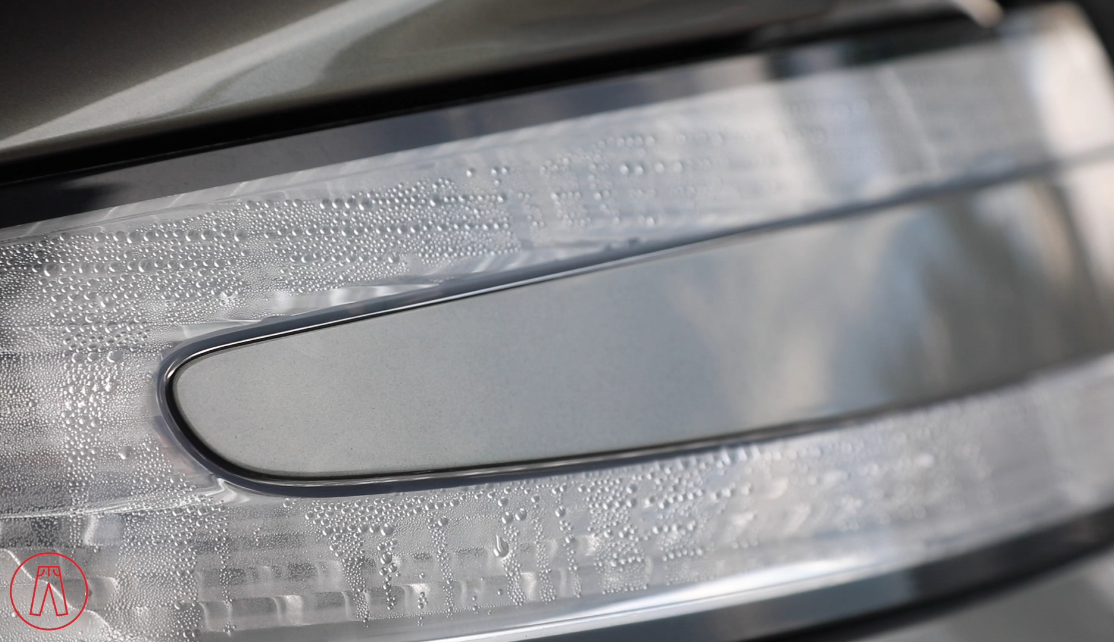
One of the main areas of concern for Aston Martin owners is the dreaded condensation issue that can affect the headlights and tail lights. If caught early enough, it may be possible to repair the tail light before the LED control board is damaged and no longer operational. This DIY Guide shows how to do a slightly altered version of one of the repair methods, which is based on Aston Martin’s factory guidance in TSB 0286 (AKA SB0286V2). The difference is that I drilled two slightly smaller holes rather than one large one. I also give a general description of how to bake the tail light to separate it for a more invasive repair.
Keep in mind that these procedures may mitigate or prevent damage, but they will not reverse damage. Meaning, if a tail light has stopped functioning, the steps below will not fix it and make it work again. Additional work will need to be done - namely, the LED control boards will need to be replaced or repaired. Also keep in mind that these tail lights are supplied to Aston Martin as complete units so the individual components (like those LED control boards) are not available on their own.
Needed
Tail Light Repair Kit
Drill and drill bit (see Before You Begin below for more information)
19mm socket with ratchet
Small flat-head screwdriver
Isopropyl alcohol
Shop towel or similar
Sealant *
About 30-45 minutes per tail light
* The sealant is only needed if the tail light housing is cracked or the seal between the lens and housing has split or separated, or if the lens is removed from the housing.
Before You Begin
The drill bit you use to make the holes should be sized appropriately for the patches you’re using.
Aston Martin’s TSB says to drill a single hole when doing this job. My “slightly altered” method is the one I showed in the video above. It uses two slightly-smaller holes than the one specified by Aston Martin. Regardless of which method you use, make sure you use the correct size drill bit so the patches cover and seal the holes.
I used two 10mm holes in the video, which are the appropriate size for the patches I include in my Tail Light Repair Kit.
Step 1
Remove the tail light from the car using the socket, ratchet, and flat-head screwdriver. Here’s a DIY Guide if you need it.
Step 2
Carefully and completely inspect the tail light for any cracks in the lens or housing, and for any splits or separation in the sealant between them. Mark any you find so they can be quickly located for repairs.
Step 3
Make a mark ~45mm from the edge of the tail light housing, centered in the flat area shown in the picture below. You want your hole to be 40mm from the edge of the housing.
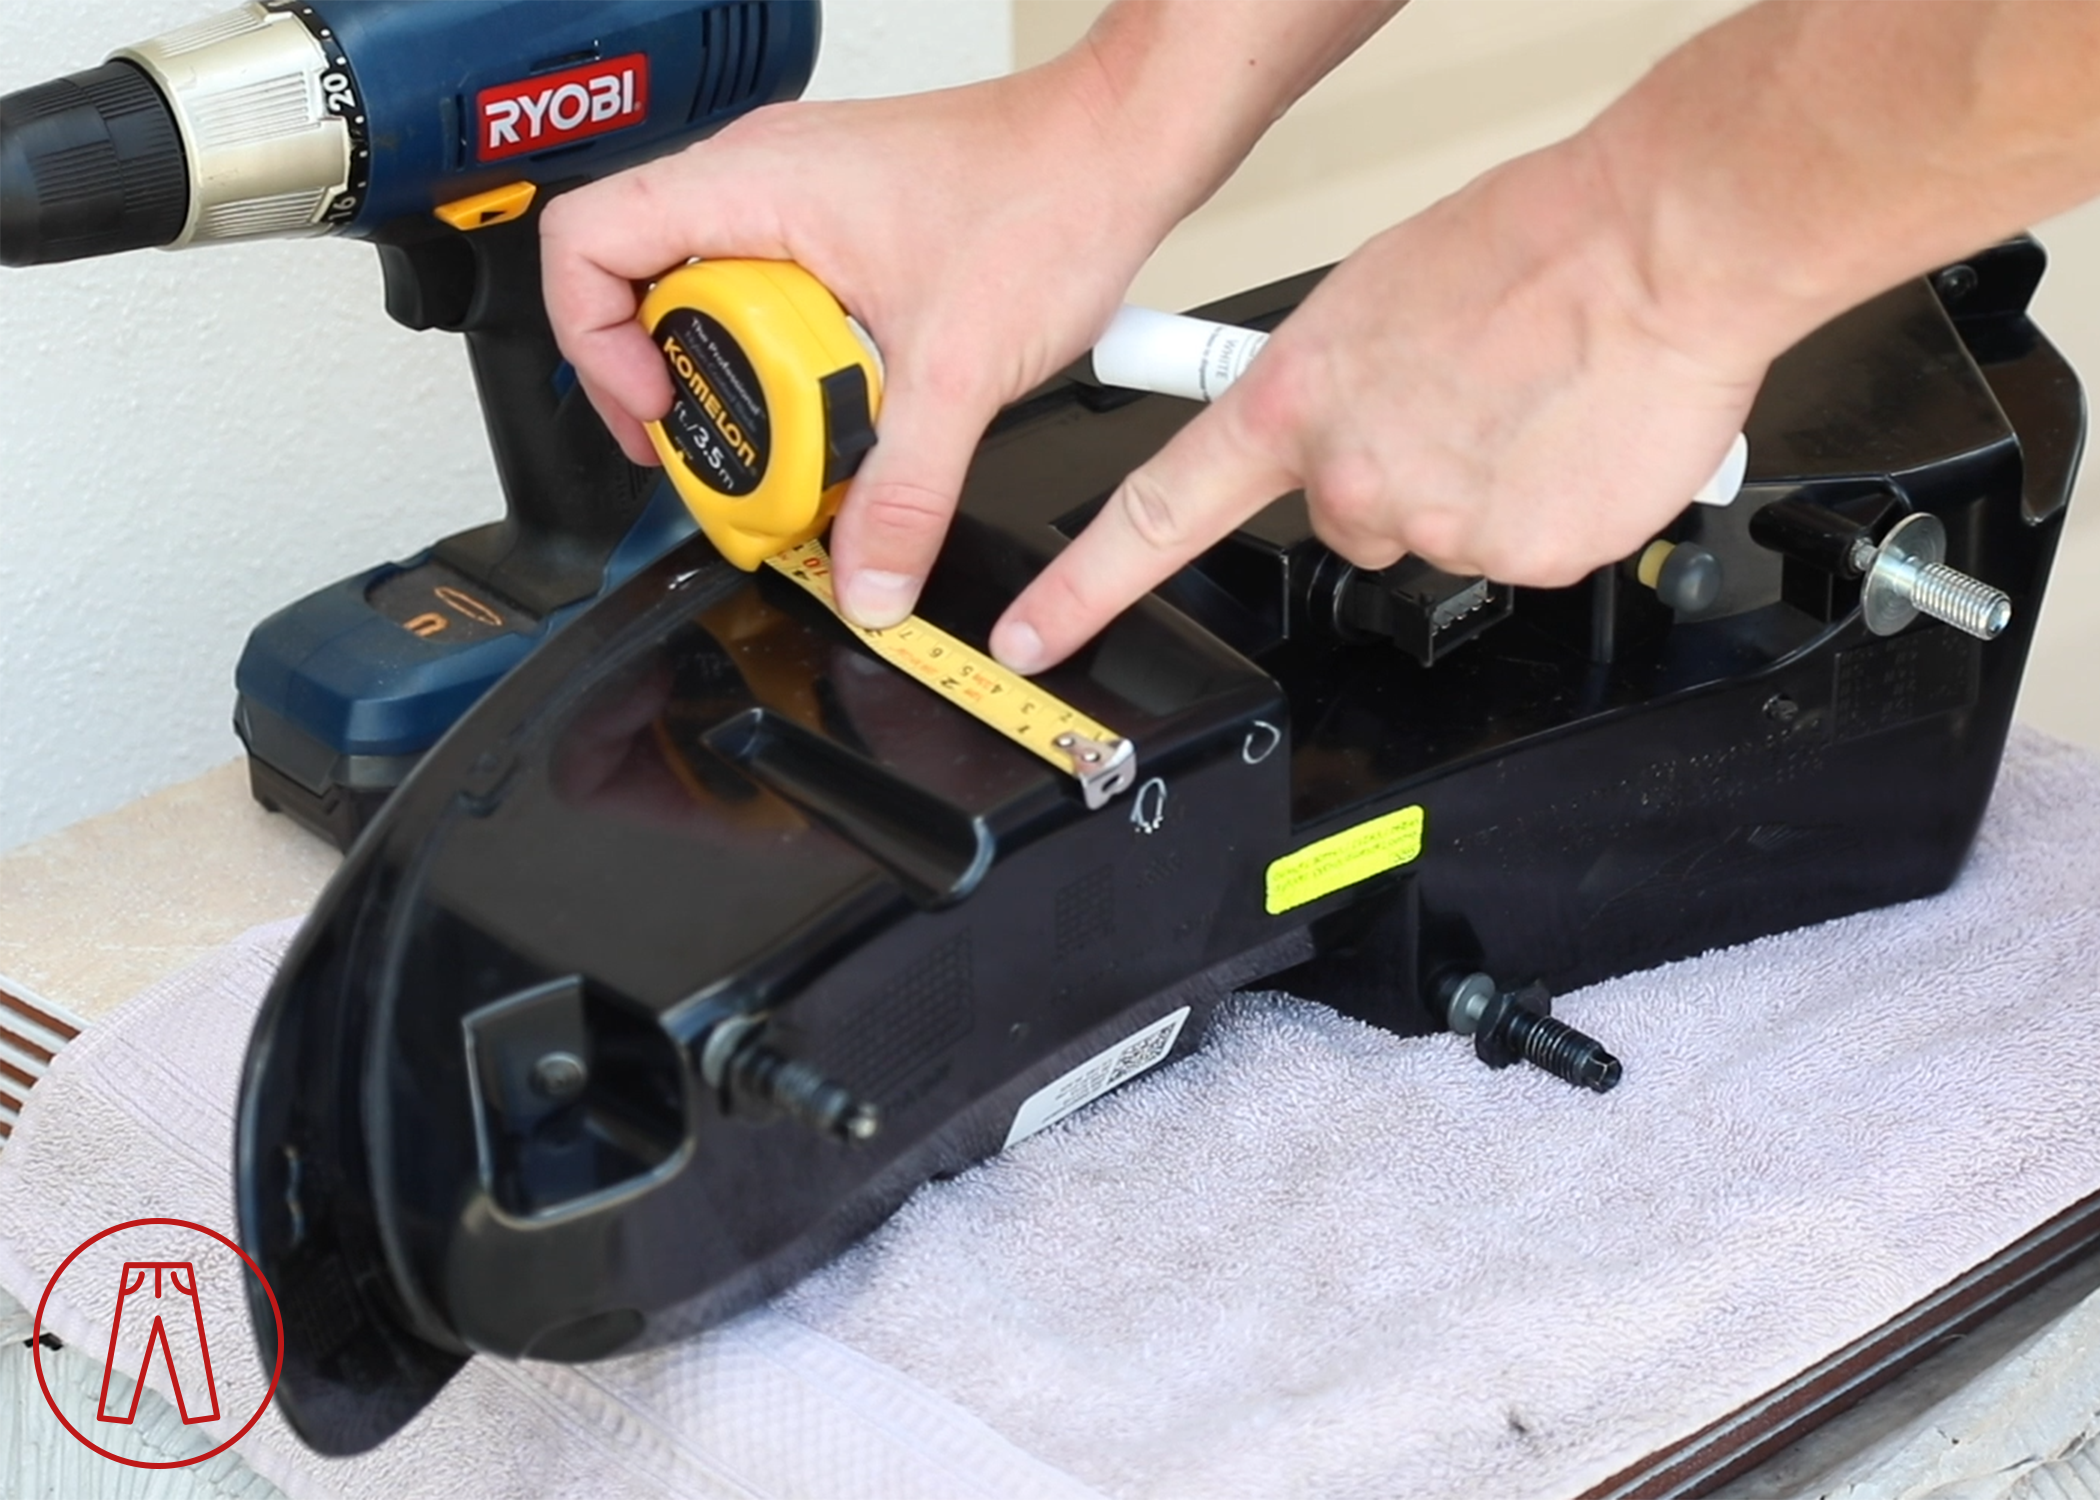
WARNING: Do not drill more than 10mm deep into the housing, regardless of whether you’re drilling one hole or two. Drilling deeper than 10mm into the tail light housing can result in permanent damage to the interior of the tail light.
One Hole Method
Carefully drill a hole on the mark you made, then clear away the plastic swarf (shavings, bits, etc) without letting any fall into the tail light housing. If any does fall in, hold the tail lamp upside down and gently shake it until the swarf falls out.
Two Hole Method
Using the mark you made as a middle point, measure 10mm in each direction and make another mark on each side.

Carefully drill a hole on each of the two new marks, then clear away the plastic swarf (shavings, bits, etc) without letting any fall into the tail light housing. If any does fall in, hold the tail lamp upside down and gently shake it until the swarf falls out.
Step 4
Blow air into the tail light to dry it out. Be careful to not introduce more water into the tail light while doing this - if you’re using an air compressor, use an in-line filter to separate any moisture that might be in the air. This can take a while depending on how much condensation has formed in the tail light, so be patient. It might help if you can insert a small hose into the holes to more directly hit wet spots inside the tail light with the air.
Continue inspecting the tail light while blowing air into it as this may expose additional cracks or issues that hadn’t been noticed during Step 2.
Step 5
NOTE: If the original tail light sealant has split too much, it may be necessary to completely separate the lens from the housing and completely re-seal it. Jump down to Baking a Tail Light before continuing.
Apply the isopropyl alcohol to a shop towel or similar and use it to clean any areas where cracks were found on the tail light. Once dry, use sealant to fill them in and cover the area around them.
Smooth out any sharp or rough edges around your drill hole(s), careful to not let any swarf fall into the housing. Then clean the area around the drill hole(s) using the isopropyl alcohol. Once dry, apply a Goretex patch to each hole drilled.
Reinstall the tail light, check it for functionality, and you’re all done!
Baking a Tail Light
WARNING: Attempting this can easily lead to completely ruining the tail light. Do not attempt this unless you’re willing to risk disposing of the tail light entirely. Also be careful to avoid personal injury as you’ll be working with a hot tail light and sharp knife.
Place the tail light on a cookie sheet or other flat tray.
Bake the tail light at 250-300F (120-150C) for 3-10 minutes to soften the sealant so they can be cut apart. The range in temperatures and times is due to a variety of factors, including the age and condition of the sealant. Baking at too low a temperature may not soften the sealant enough for it to be separated. Baking at too high a temperature may result in damage to the tail light.
Carefully remove the tail light and use a sharp knife or similar tool to cut the softened sealant. You’ll want to do this while the sealant is still hot and soft, but be careful so you don’t burn yourself, and being careful to not cut or scratch the tail light lens.
Separate the lens from the housing, keeping the locking tabs in mind, while also being careful to not bend or warp the lens while pulling on it.
Once separated, carefully remove as much sealant as possible without damaging the lens or housing.
Allow the lens and housing to completely cool, the apply new sealant to the necessary areas. Do not apply too much or it may press out and get in places you don’t want it. Do not apply too little as it may not seal properly. Once the sealant has been reapplied, carefully reattach the lens to the housing.
Check to make sure the sealant has completely and adequately filled in the space between the lens and housing, then let the tail light sit for as long as it takes the sealant to cure (check whichever sealant product you’re using for this information).
If all goes well, jump back to Step 5 and continue.