

Door Bar Removal DIY Guide
DISCLAIMER
As always, follow all safety protocols. Don't undertake this task if you aren't comfortable with it, fully understand it, and are capable of completing it. The information provided may be incomplete or inaccurate. You are ultimately responsible for anything you do. Neither Redpants, LLC or myself is responsible or liable for anything that may occur.
Removing the door bars in an Aston Martin is a pretty easy job except for a tricky little clasp inside them. There are a few reasons to remove the door bars: it’s the first step for removing the door panels, you may need to refinish them to repair chips from the seat belt buckles, or you may want to upgrade them with a set of carbon fiber ones, or… all of the above.
Needed
Door bars (optional)
5mm Allen key
Philips-head screwdriver
3mm Allen key *
7mm box-end wrench *
Zip ties *
Snips *
Hammer *
Pliers *
15-30 minutes
* If you’re changing to new door bars that don’t already have the door handle fitted to them, you’ll need these extra tools to finish the job.
Before you begin
While removing the door bar is a very simple task, swapping over the latch mechanism within it can be very difficult. Here are some tips if you are going to do that.
Try holding the spring coils down in the nook of the door latch during the whole process. This will help the pin slide through.
Go slowly for everything during this portion of the job, as a quick slip can cause the spring to pop out of alignment and you’ll have to remove the latch and spring and reassemble them.
Have extra zip ties so you can start over fresh if you want or need to.
DO NOT overtighten any of the fasteners against plastic or carbon fiber as this can easily damage them.
DO NOT point the door latch spring toward you when removing it as it can fly out and cause injury. Point it in a safe direction in case it does shoot loose.
Step 1
Use the 5mm Allen key to remove the two bolts holding the door bar in place. With those bolts removed, you can pull the door bar out. It may be snuggly fit into the leather of the door panel, but don’t pull too hard - it’s still connected by the door latch cable.

Step 2
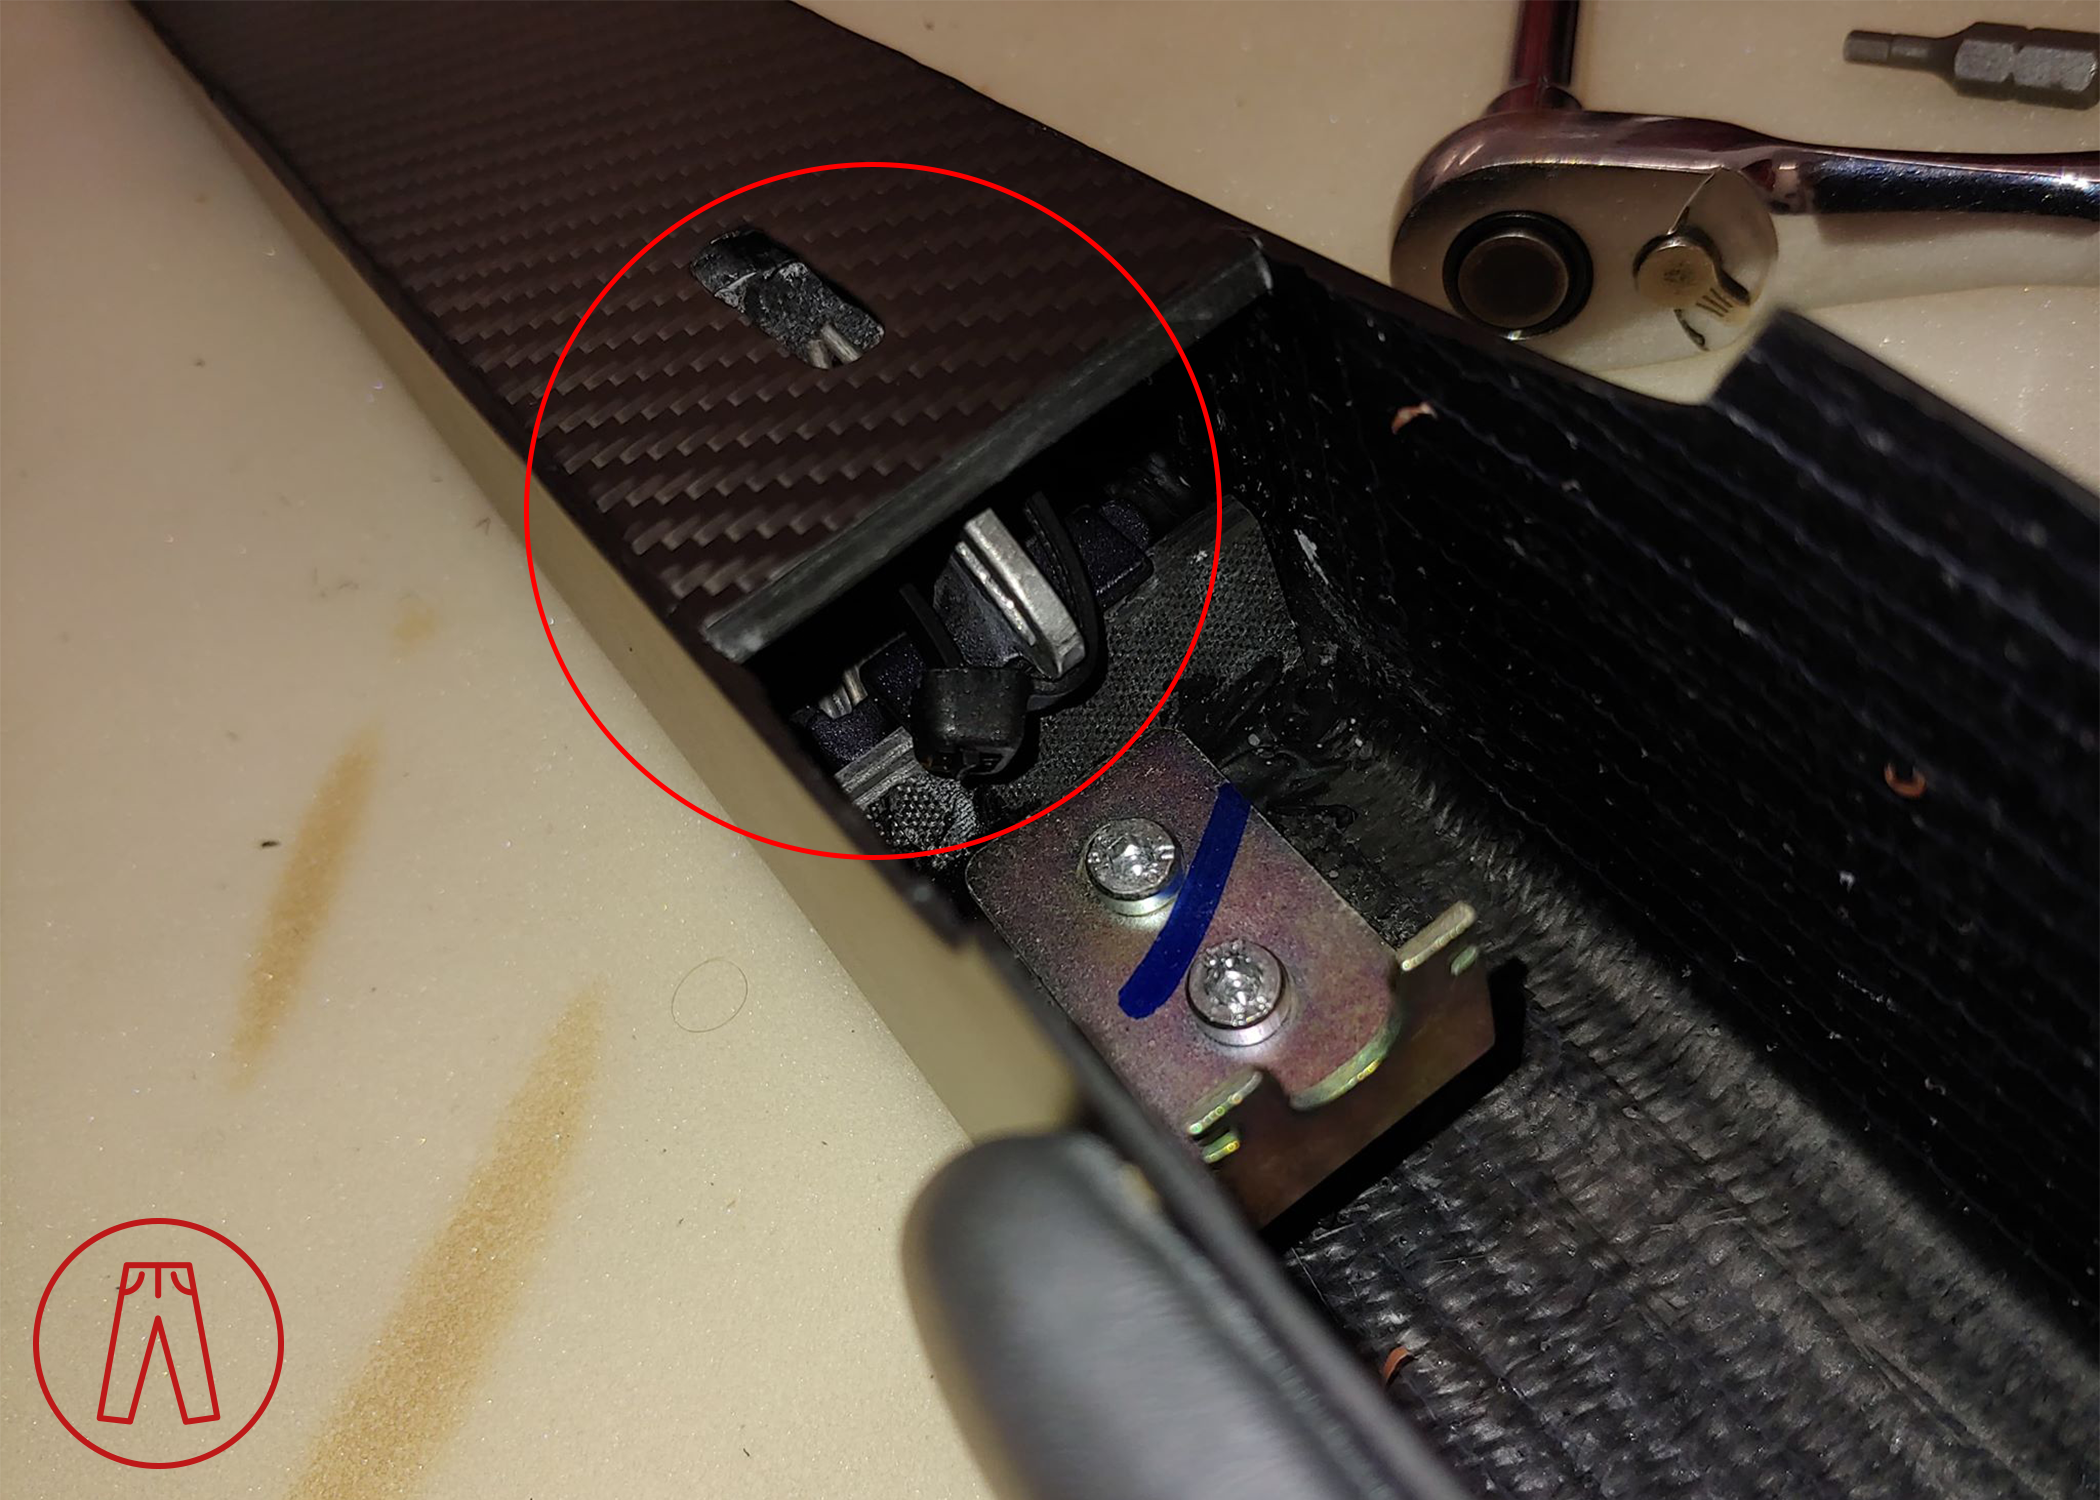
Use the screwdriver to remove the screws holding the Alcantara (or leather) panel on the backside of the door bar, then remove the panel. This will expose the door latch cable.

Step 3
Carefully unclip the door latch cable’s plastic clip. These clips are very easy to break, so take your time and look at how it’s attached so you can safely unclip it. I use a tiny flat-head screwdriver to gently push the tabs out - align the tip of the screwdriver with the metal bracket and gently push toward one of the black ‘arms’ of the clip.
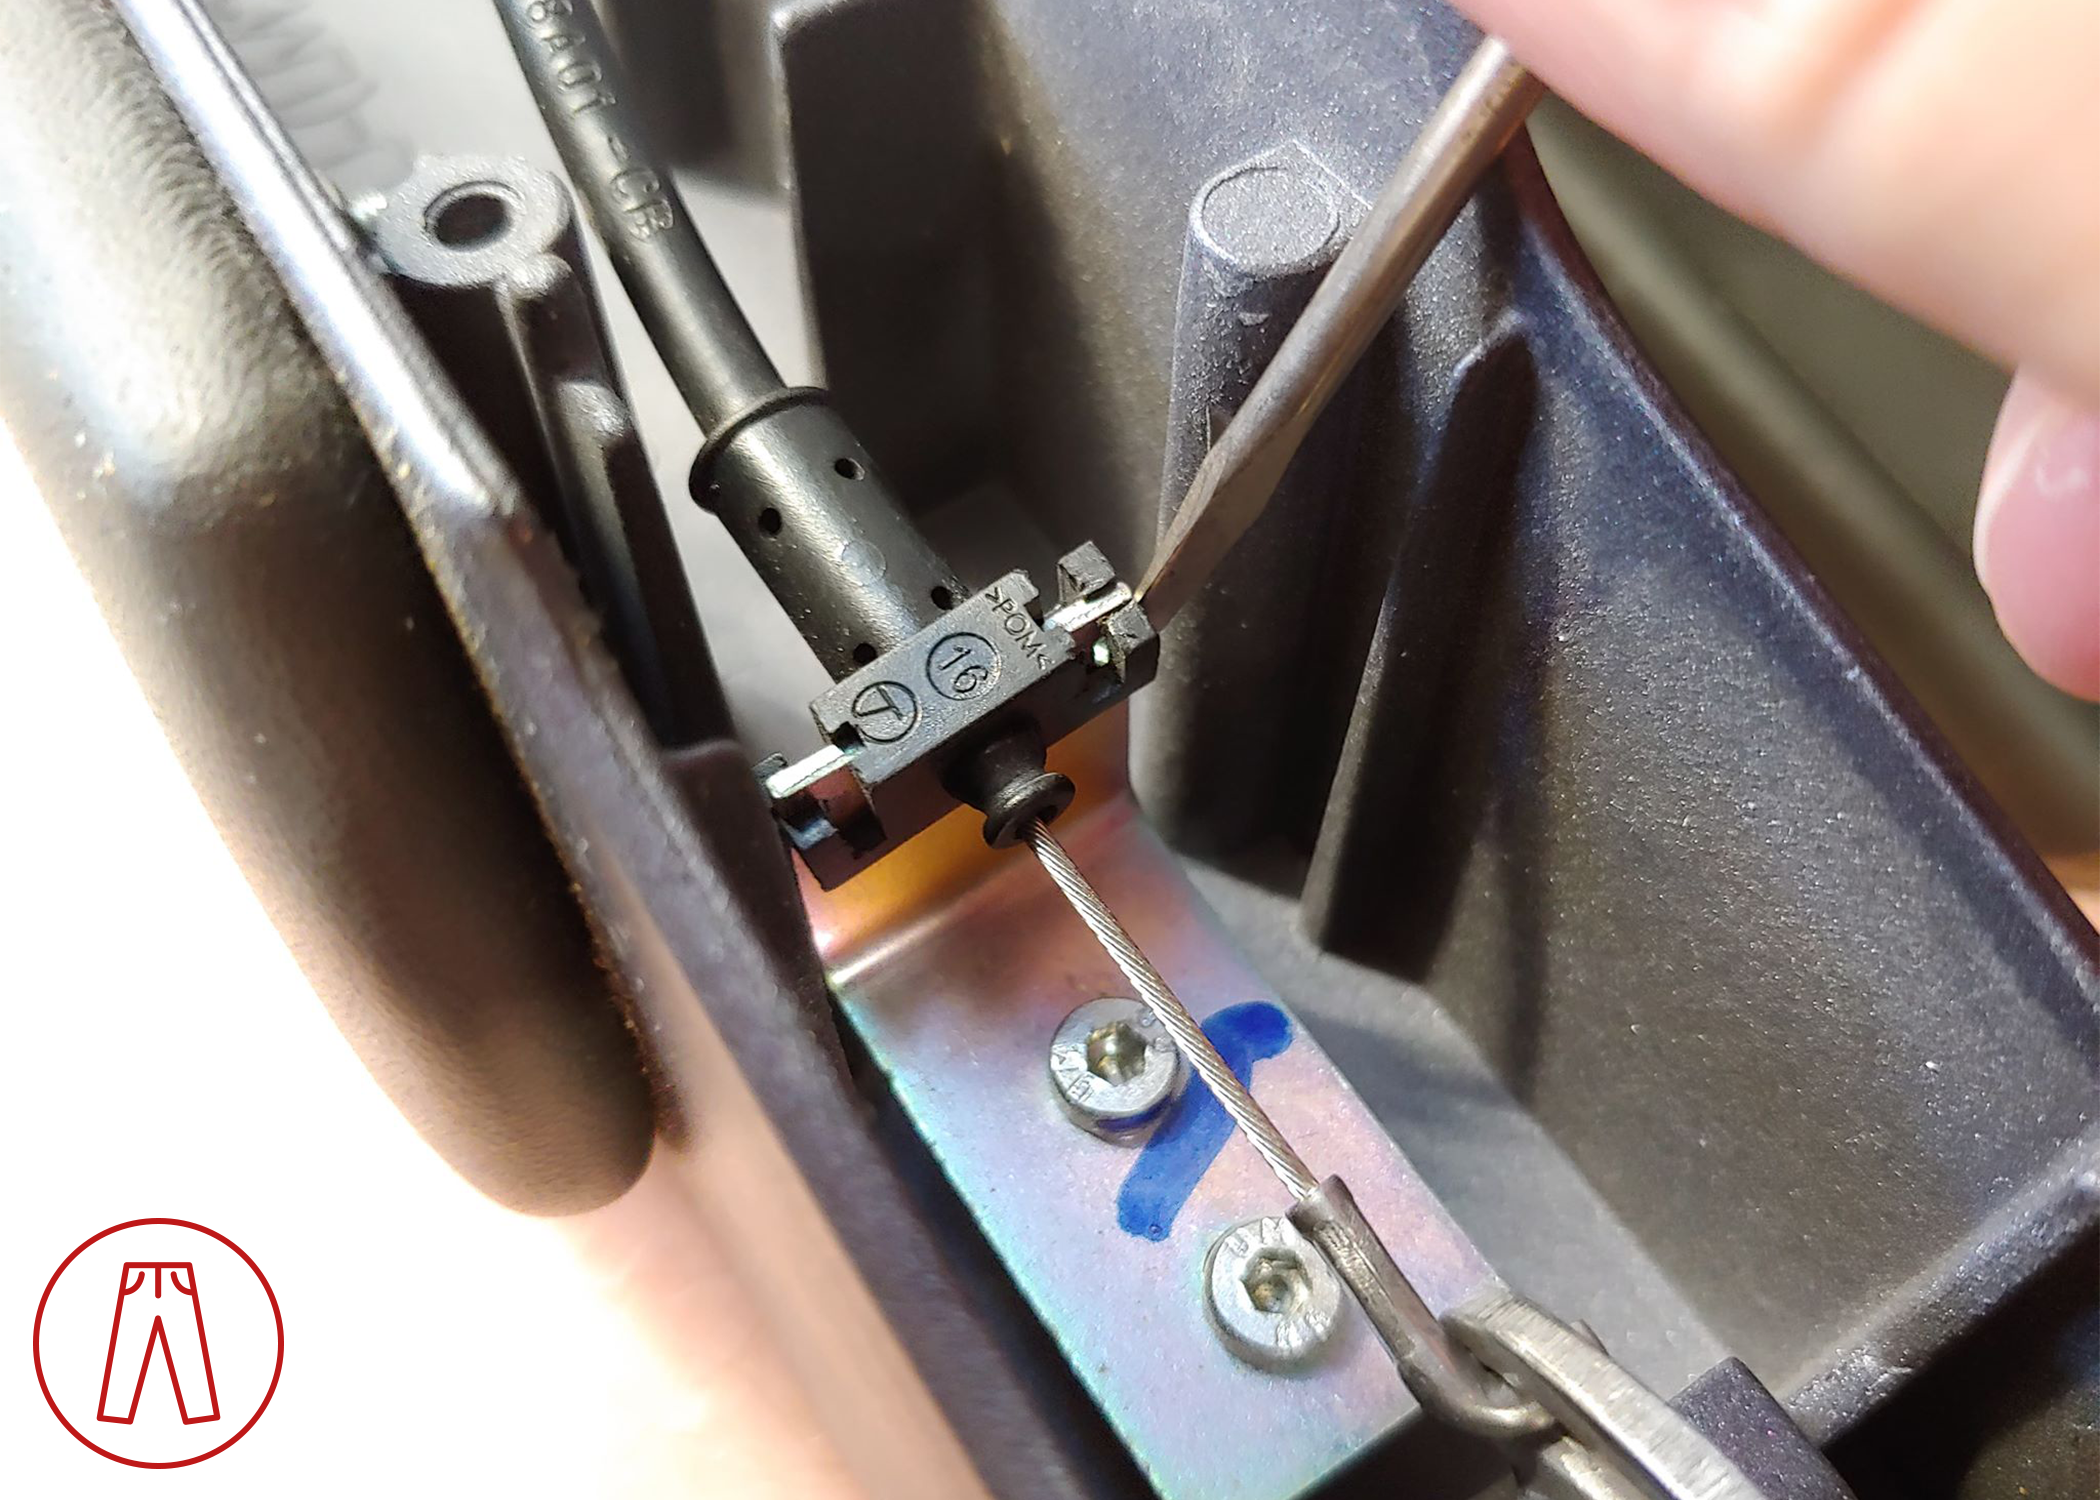
Once unclipped, rotate the door bar so the hooked end of the door latch cable aligns with the slot it’s in, and then pull the door latch cable free from the door bar.
The door bar is now completely free from the door.
Note: If you’re putting your originals back in place, installation is the reverse order of the steps above. If you need to swap over the door bar pads or the door latch, continue with the rest of this DIY Guide.
Step 4
Use the 7mm box-end wrench to remove the three nuts holding the elbow pad onto the original door bar. Swap the elbow pad to the new door bar. Be careful to not over-tighten the nuts, especially if you’re installing a carbon fiber door bar!

Step 5
Use the 3mm Allen key to remove the two bolts holding the door latch cable bracket in place. Swap the bracket to the new door bar. Be extremely careful not to strip these! If you do, they’re pretty much staying in place forever.

Step 6
Next you need to swap the door latch from the old door bar to the new one. This is where things get really tricky.
Note: Take pictures of the original arrangement of the brackets, clips, springs, or anything else before you start removing things if you think you’ll have trouble remembering how it should be reassembled.
There’s a pin holding the door latch in the door bar. You can see one end of it exposed on the underside of the door bar. Use the pliers to grab the exposed pin at its halfway point - there’s an opening in the spring there. Clamp down tightly on it, then use the hammer to hit the pliers to then force the pin down. Be very careful doing this, and don’t use too much force.

Once the bottom of the pin is exposed enough outside of the door bar, use the pliers to pull the pin out.
WARNING: Point the opening where the spring is away from you, as once the pin is far enough out, the spring can fly out of the door bar!

There are two very small black plastic sleeves in the holes on the door latch where the pin goes through it. Do not lose them and keep track of them as you continue this step. If they come out of the door latch, don’t forget to put them back during final assembly.
Step 7
You should now have the door latch, door latch spring, and door latch pin. Add in a swear jar if you think you’ll need one.
Reassemble the latch outside of the door bar - put the spring in place, press down on the coiled section to fully seat it inside the nook of the latch and hold it there while you slide the pin in place to hold the spring in the latch. (Don’t forget to keep track of the black plastic sleeves.)
Take a zip tie and create a loose loop with it. Put the looped zip tie around the two open ends of the spring and pull them back toward the other end of the latch, then slip the looped zip tie over the other end of the latch. Slowly tighten the zip tie to draw the two arms of the spring closer and closer to the end of the latch, keeping the two arms of the spring from crossing (touching is fine, but don’t let them cross). Snip the excess end of the zip tie off. You should now have this:

Step 8
The pin is only there to keep the assembly together while you put the assembly in place. Put the zip-tied latch assembly into the door bar so the spring arms are on the side they need to be in.

Carefully remove the pin. If the sleeves come out of the latch, put them back in. Seat the latch assembly in the door bar with the holes for the pin aligned between the door bar and latch assembly.
In the pic below you can see the latch assembly in position but still zip tied together. You can see the two ends of the spring in the slot at the top of the picture.
Step 9
Snip the zip tie, pull it out of the door bar, and discard it. Use a narrow tool (flat-head screwdriver or needlenose pliers) to push the two ends of the spring apart/outward so they snap into place.
Make sure the black sleeves are still in the holes of the door latch. Push the pin through the hole in the door bar, through the first hole in the door latch, through the spring coils, through the hole on the other side of the door latch, and into the hole on the other side in the door bar.
Step 10
Reinstall the door bar using the steps above in reverse.
And that’s it!