
Throttle Body Cleaning DIY Guide
DISCLAIMER
As always, follow all safety protocols. Don't undertake this task if you aren't comfortable with it, fully understand it, and are capable of completing it. The information provided may be incomplete or inaccurate. You are ultimately responsible for anything you do. Neither Redpants, LLC or myself is responsible or liable for anything that may occur.
A commonly overlooked maintenance task is cleaning the throttle body (V8) or throttle bodies (V12) of an Aston Martin. This is something that could be done on any car, but it’s only really mattered on my Astons and no other car I’ve owned.
It’s a quick and easy job, though, and an easy thing to add to your maintenance list. Since it’s part of the intake system and intake filters are already replaced every-other year, I usually recommend cleaning the throttle body at the same time as replacing your intake filters.
This job is the same for V8 and V12 cars with the exception of the V8 having a gasket and the V12 having an O-ring, and the job needing to be done twice (once per throttle body) on the V12 cars.
Needed
New gasket (V8) or O-rings (V12)
- V8 Vantage
- DB9.1 / DBS / Rapide / Virage / V12 Vantage
- DB9.2 / Rapide S / Vanquish, V12 Vantage S
8mm socket
Ratchet
Pliers or channel locks
Pick or tiny flat-head screwdriver *
Clamp tools **
Cleaning brush (or old toothbrush)
Throttle body cleaner
Cotton swabs *
Isopropyl alcohol *
Shop towel or paper towels
About 15 minutes per throttle body
* You only need these if you’re opening the throttle body to clean its internals in Steps 5-7.
** You can use screwdrivers instead of clamp tools. Watch the video above to see how it works.
Torque Ratings
Throttle body bolts: 8-12 Nm. (6-9 lb/ft)
Step 1
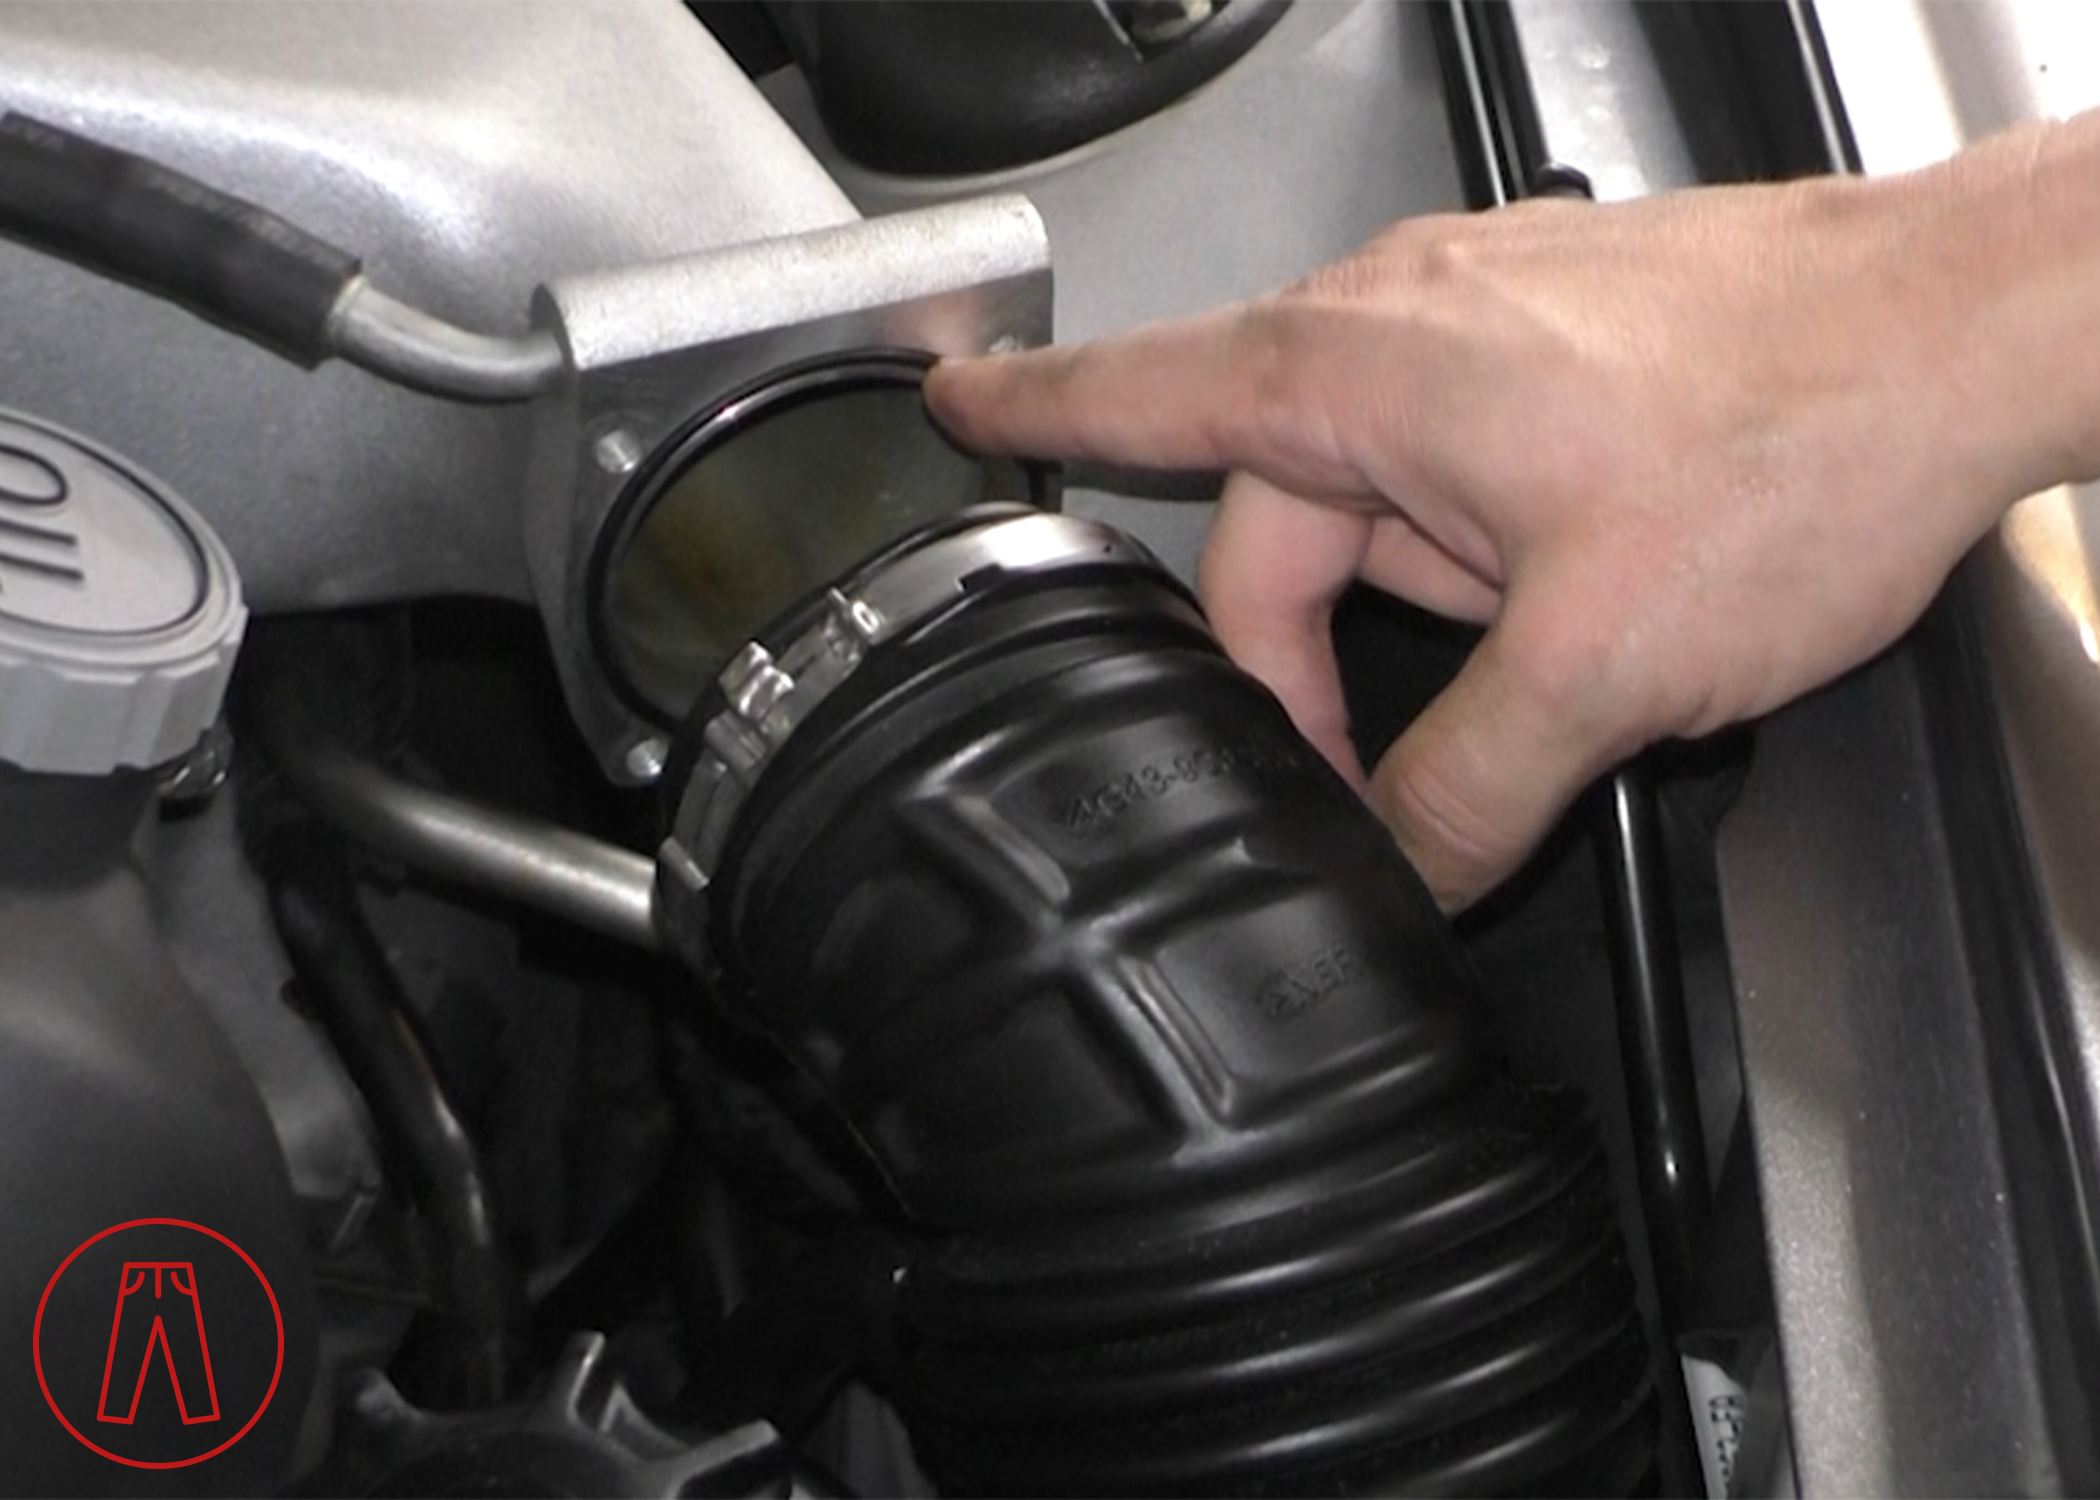
Release the clamp that secures the intake duct to the throttle body, then pull the duct free from the throttle body.
If you don’t have clamp tools:
On the V8, you can use a pair of screwdrivers to open the “jaws” of the clamp. Watch the video I made for this job to see how I do this.
On the V12, you can use a small flat-head screwdriver to pop the clamp open, like this:

Step 2
Unplug the throttle body connector. The connector is circled in the picture below.

Step 3
Use the ratchet and 8mm socket to remove the four bolts holding the throttle body to the intake manifold. With the intake duct disconnected from the throttle body, you can move the duct around to easily access each bolt.
There are four bolts on the throttle body - two are easily visible at the top (circled in the picture below), and two more are located directly below them (they’re arranged as a square).

With the bolts removed, the throttle body will be completely free for removal from the car.
On the V8, keep an eye out for the throttle body gasket as it will drop when the bolts are removed. The gasket should be replaced by a new one, so set the old one aside for disposal once the job is done.
On the V12, remove the O-ring from its groove in the intake manifold, shown in the picture below.
Step 4
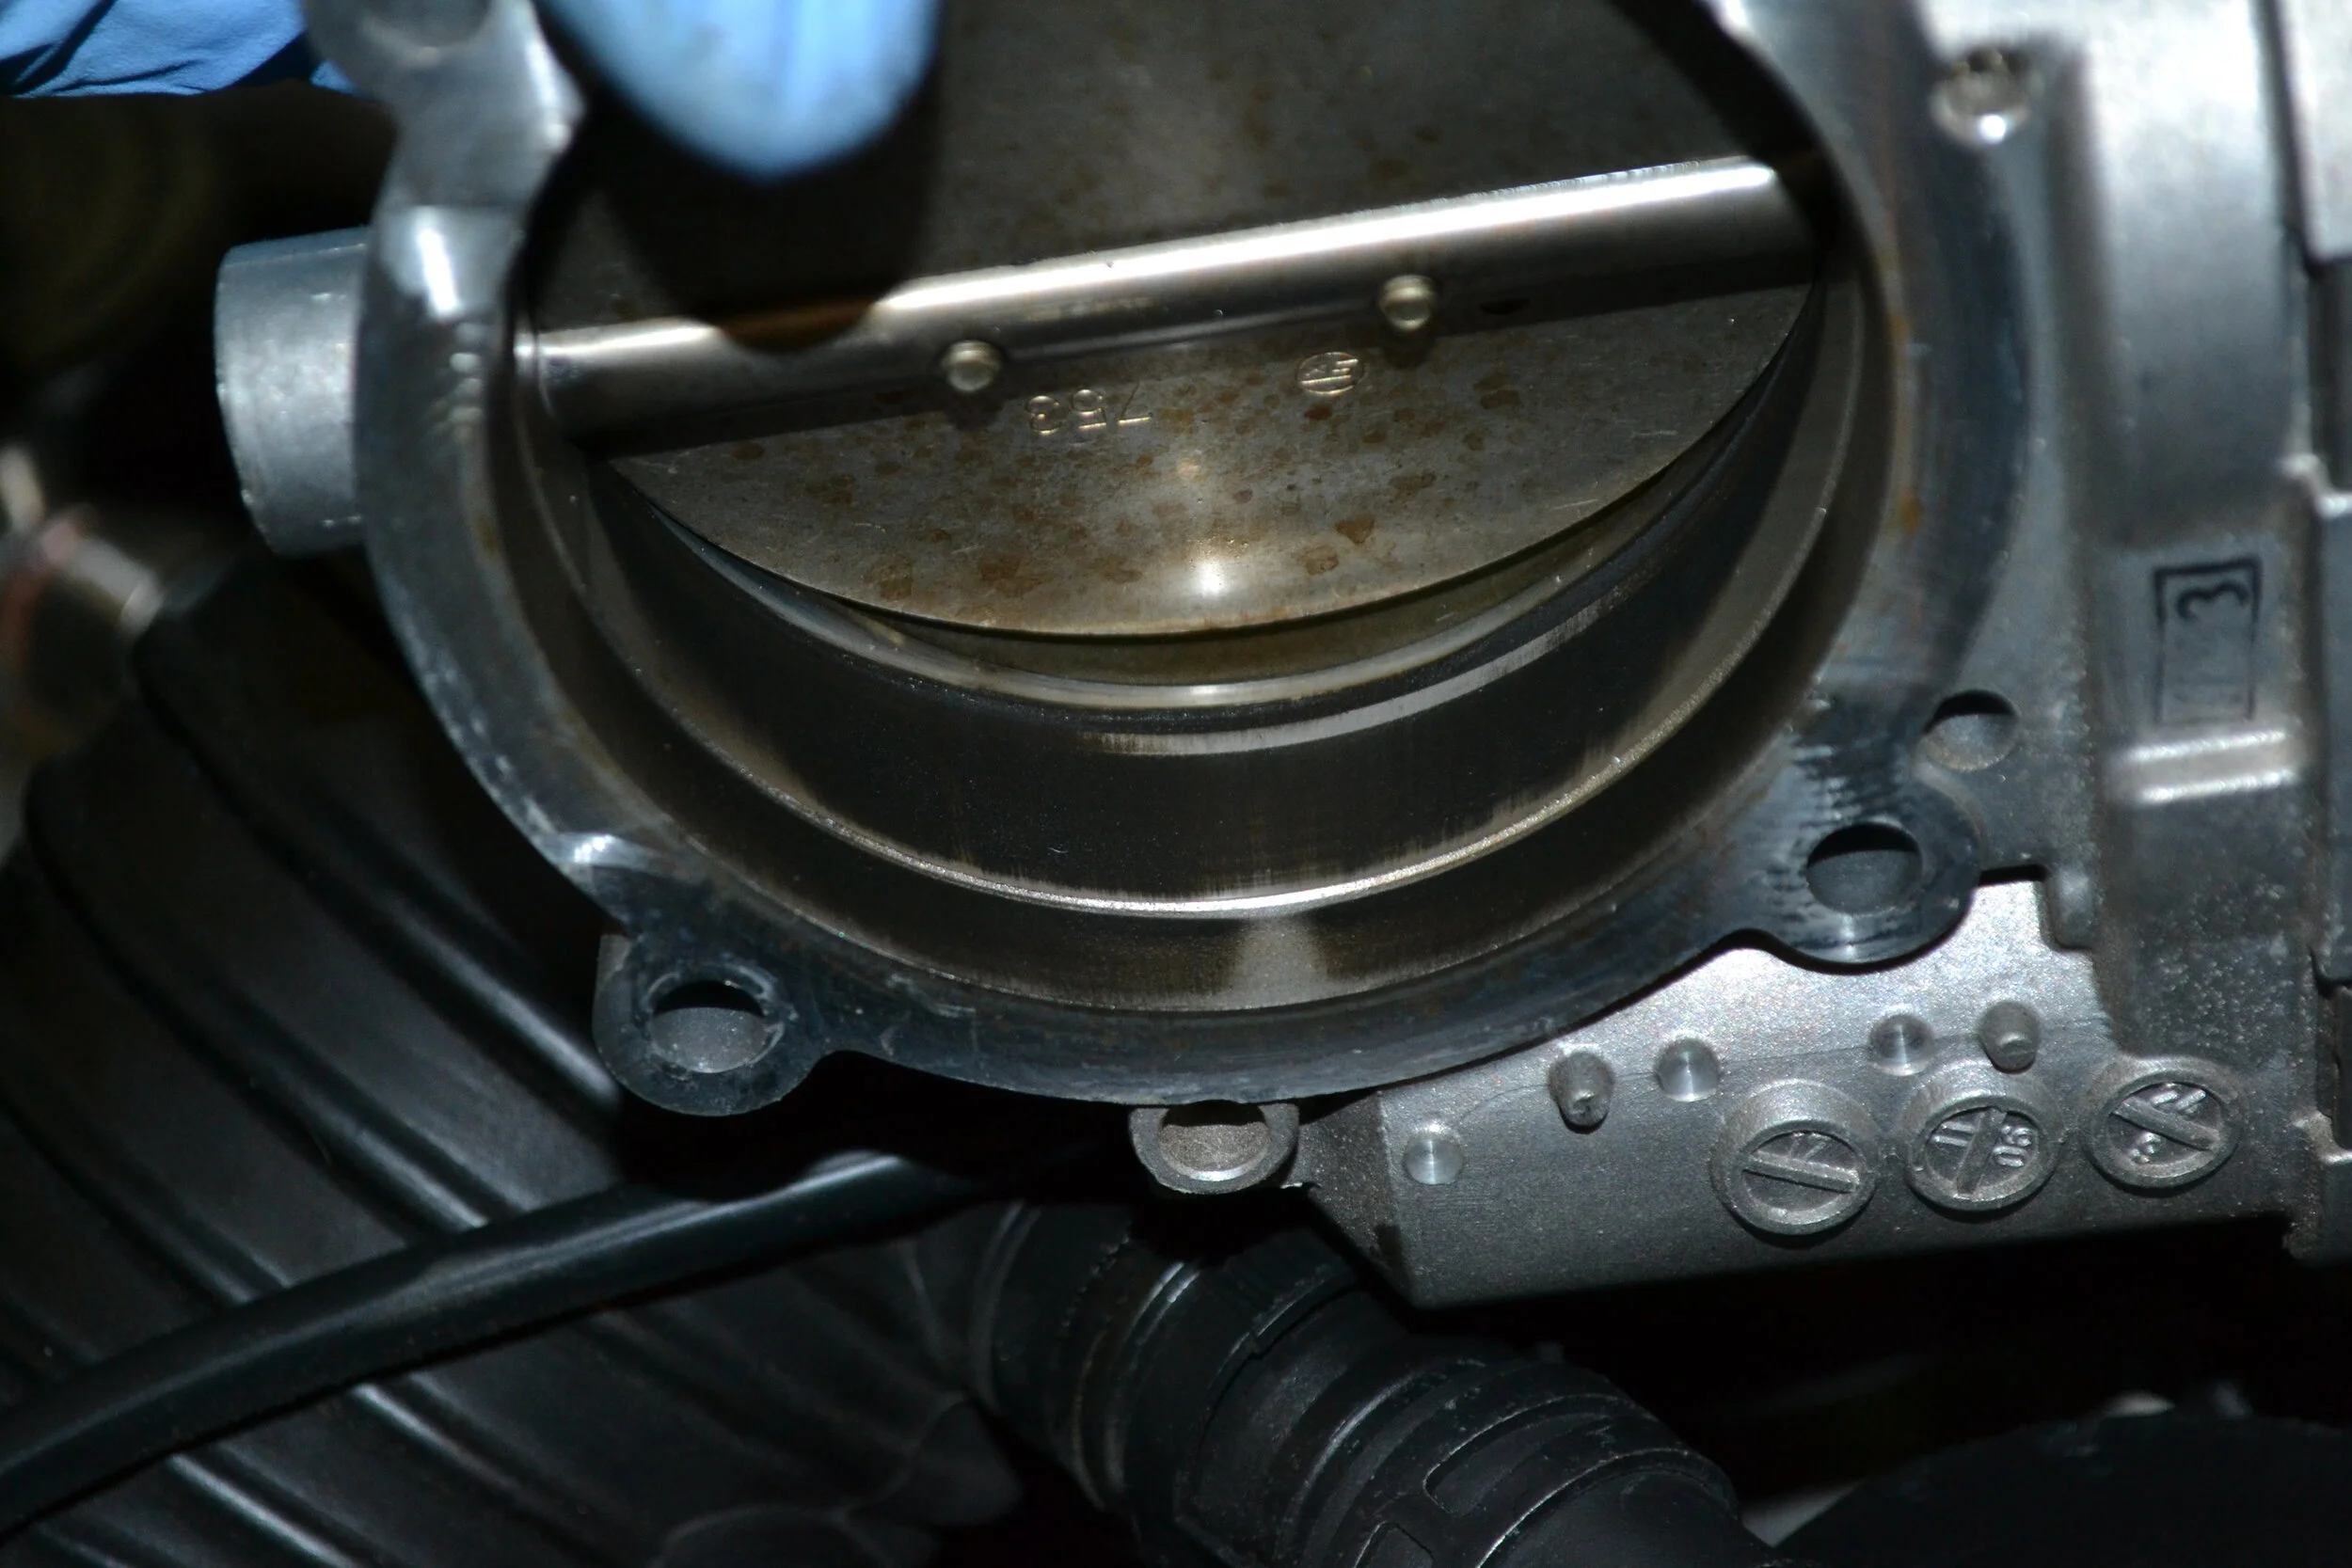
Use a cleaning brush and cleaner to clean the inside of the throttle body. You can push open the butterfly valve open with your fingers. Once finished scrubbing, wipe everything clean with a shop towel or paper towel, making sure no lint or debris remains when done.
NOTE: An old toothbrush is a very cheap and common thing to use for jobs like this. Just… don’t let that toothbrush get into a mouth ever again.
Step 5
If you’re opening up the throttle body to clean its internals, continue following Steps 5-7. Otherwise, jump to Step 8.
Use a pick to pop the clips off the throttle body’s cover. Keep your thumb over the top of the clips as you pop them loose - they can go flying if you don’t!
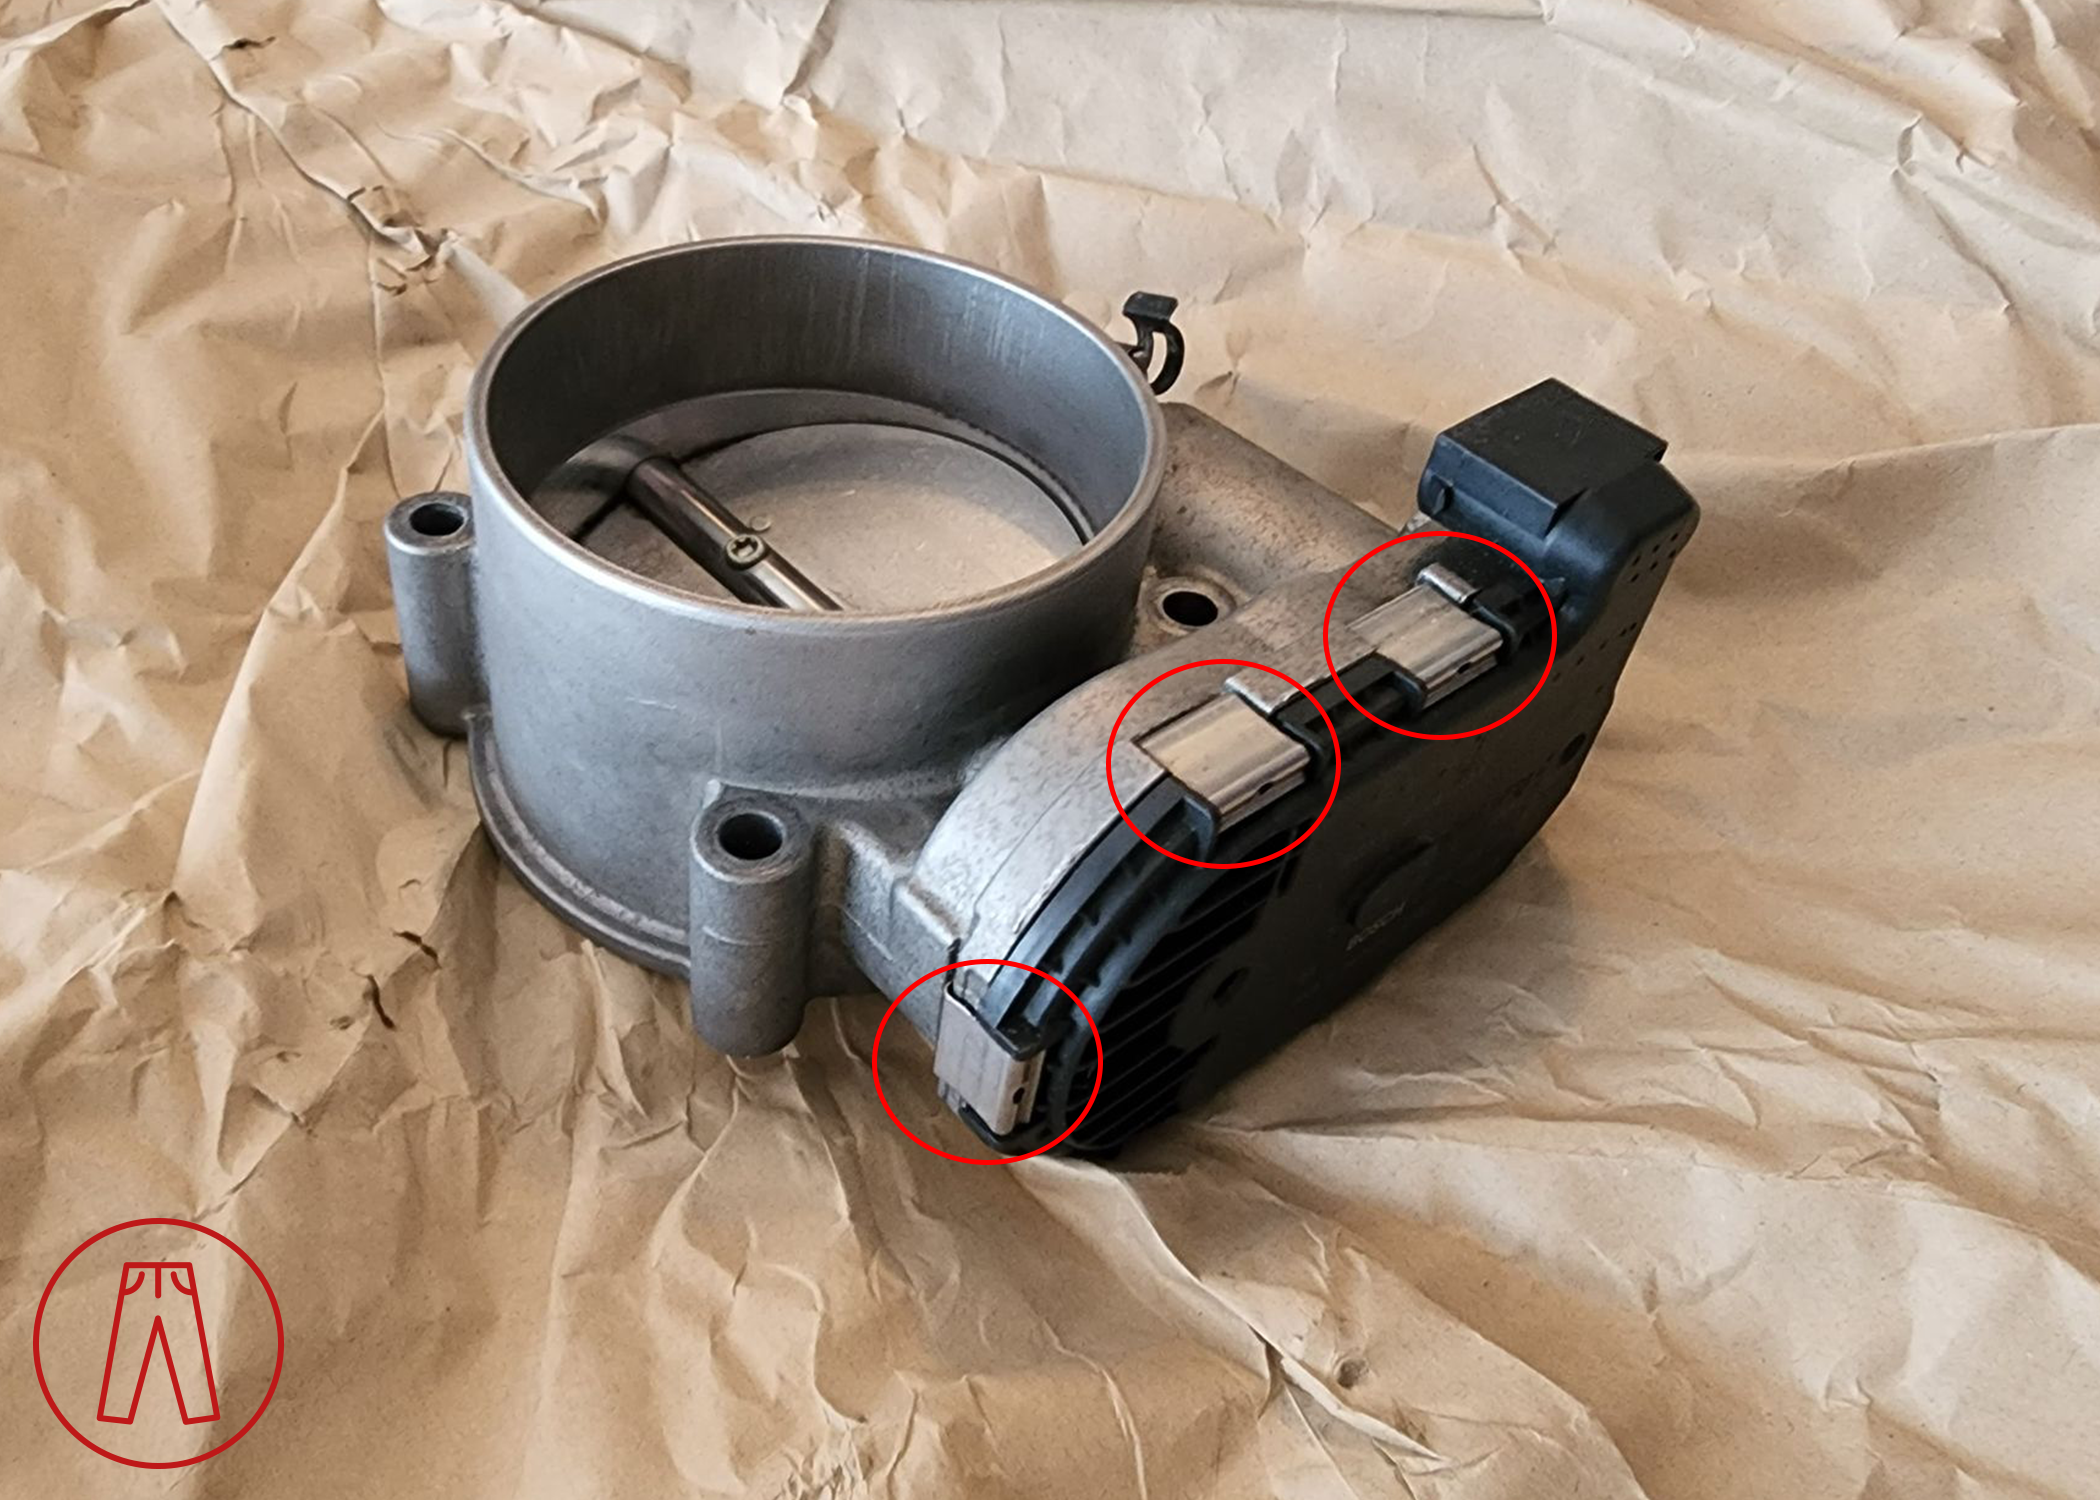
With all clips removed, pull the cover off the throttle body while being careful not to damage the gasket inside.
Step 6
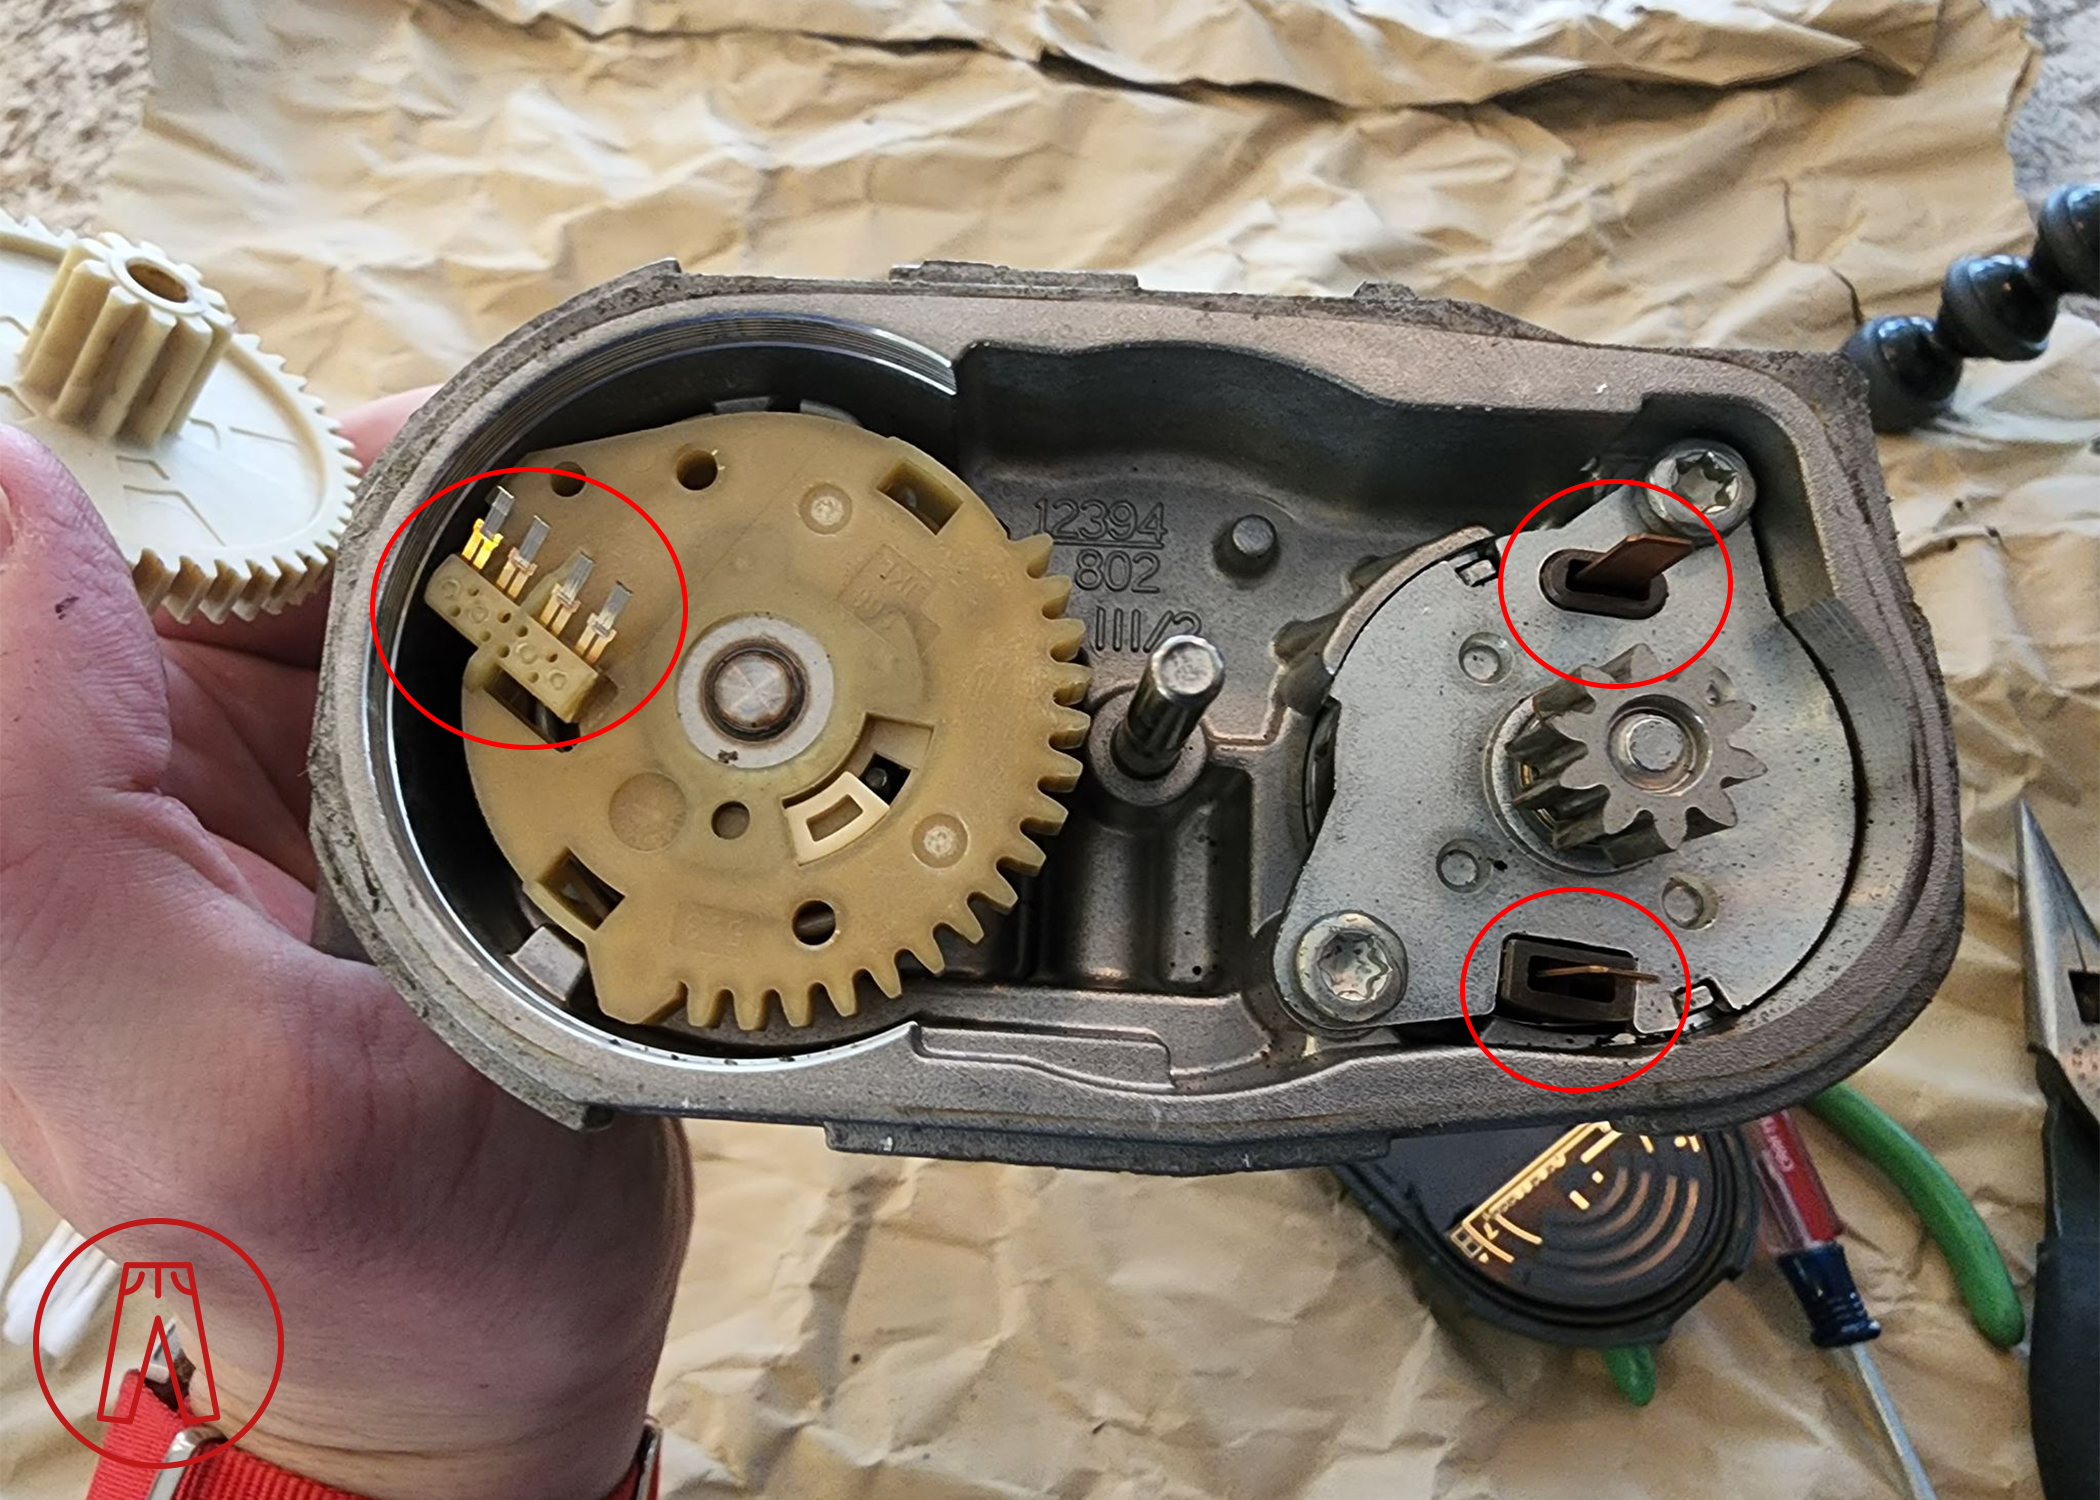
Use a cotton swab and the isopropyl alcohol to clean the metal contacts inside the throttle body and on the throttle body cover. Be very gentle with the contacts so they don’t get bent out of position. I also recommend cleaning the grooves where the gasket sits and the areas around it as well.

Warning: The four metal contacts that are circled in the left side of the throttle body picture below are extremely fragile.
Be extremely careful when working around these four contacts - the brush bristles and the tab they stem from can easily be damaged.
Step 7
Double-check that all the contacts are positioned properly, then carefully reattach the throttle body cover to the throttle body. Take your time to make sure the contacts line up and that the gasket is positioned properly between the cover and throttle body.
Step 8
Reassemble everything in reverse order using Steps 3 through 1.
On the V8: Hold the new gasket in place while inserting the bolts. Make sure the gasket is properly aligned. Tighten the bolts, reconnect the intake duct, then reconnect the throttle body wiring connector.
On the V12: Put a new O-ring in the groove on the intake manifold. Make sure the O-ring is fully seated so it doesn’t get pinched when the throttle body is tightened against it, and make sure the O-ring is not twisted or otherwise misaligned. Reinstall the throttle body, tighten the bolts, reconnect the intake duct, and reconnect the throttle body wiring connector.
Use the pliers or channel locks to fasten the clamp that holds the intake duct to the throttle body.
If you have a V8, you’re all done!
If you have a V12, you have to do it all over again on the other side because… with great power comes great responsibility.