

Gear Oil Change DIY Guide
DISCLAIMER
As always, follow all safety protocols. Don't undertake this task if you aren't comfortable with it, fully understand it, and are capable of completing it. The information provided may be incomplete or inaccurate. You are ultimately responsible for anything you do. Neither Redpants, LLC or myself is responsible or liable for anything that may occur.
This DIY Guide is for the manual and Sportshift transmissions used in Gaydon-era Aston Martins. If you’re not sure why a Sportshift would be maintained the same way as a manual transmission, check out my Information page about them. It’s also worth reading to get an idea of what gear oil to use when it’s due for replacement.
Needed
5L of Gear oil
- Motul Gear 300
- Castrol BOT270A
Gear Oil Change Package
T30 Torx Bit
14mm Hex Bit
22mm Socket*
8" extension for 22mm socket*
8mm Socket
Ratchets for the above bits, sockets, and extension
Fluid pump for gear oil (optional)
Drain pan (6+ qts capacity)
Floor jack
Jack stands
Paper towels or shop rags
* Instead of the 22mm socket, extension, and ratchet, it may be easier to use a long 22mm box wrench. I didn't try this so I'm not sure which method would be better.
Torque Specs
Drain plug: 49 Nm. (36.5 lb/ft)
Fill plug: 49 Nm. (36.5 lb/ft)
Before you begin
Gear oil is somewhat thick so it may be worth a very brief drive to warm it up so it drains more easily. It doesn’t take much to do this - you’re not trying to get it hot so keep the drive short.
Some gear oil bottles have extendable nozzles that will allow the bottle to reach the fill hole on the transmission. This is the case for both the Castrol BOT270A and Motul Gear 300 gear oils that I sell, and neither of these require a fluid pump to complete this job. Other brands may or may not have extendable nozzles.
The 6-speed manual and 6-speed Sportshift 1 (ASM1) transmissions have a reusable transmission filter that is removed and cleaned, then reinstalled with a new O-ring. This is shown in Step 5. The 7-speed Sportshift 2 (ASM2) does not have this transmission filter.
Step 1
Raise the car with a lift or use a jack and jack stands.
Step 2
Use the T30 Torx bit to remove the rear undertray. If you went for a warm-up drive, carefully check to make sure the exhaust pipes aren’t hot before continuing.
Step 3
Position a drain pan beneath the transmission drain plug.
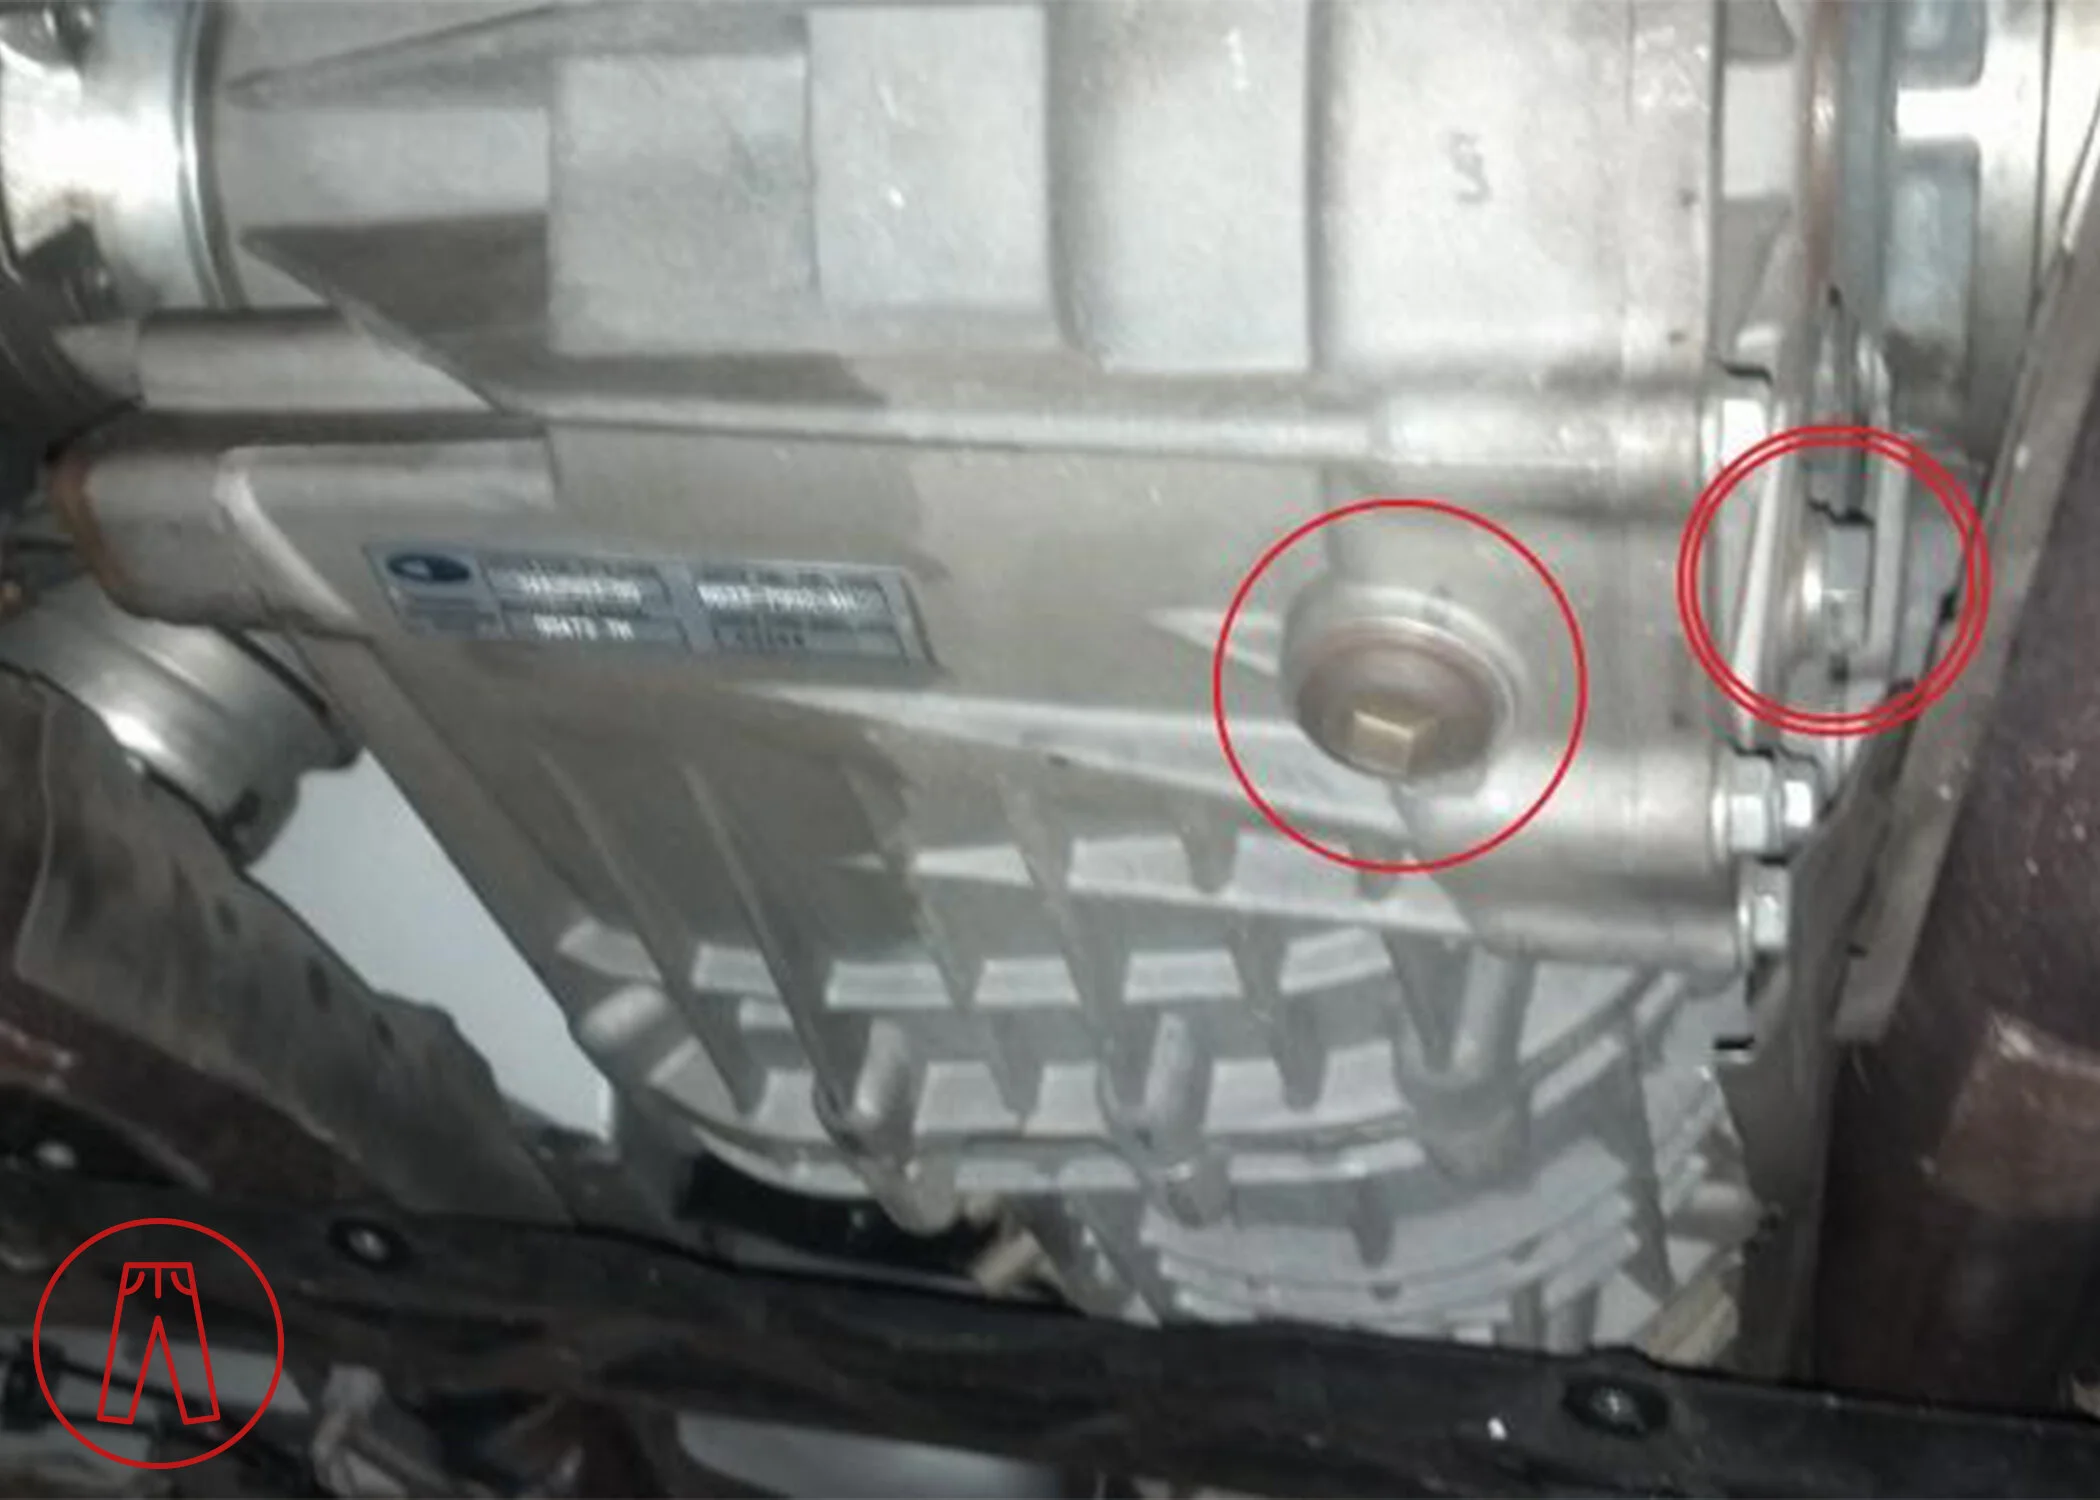
Use the 22mm socket, extension, and ratchet (or 22mm box-end wrench) to remove the fill plug, shown with the double red circle in the picture below. Opening the fill plug first will allow the gear oil to drain more smoothly.
Use the 14mm hex bit to remove the drain plug, shown circled in red below. The old gear oil will begin draining when the drain plug is loosened.
Step 4
The drain plug has a magnet that collects metallic debris from the transmission. It’d be a good idea to clean it while the transmission is draining, but be careful not to use anything that would contaminate the gear oil. Here’s what it looks like.

Step 5
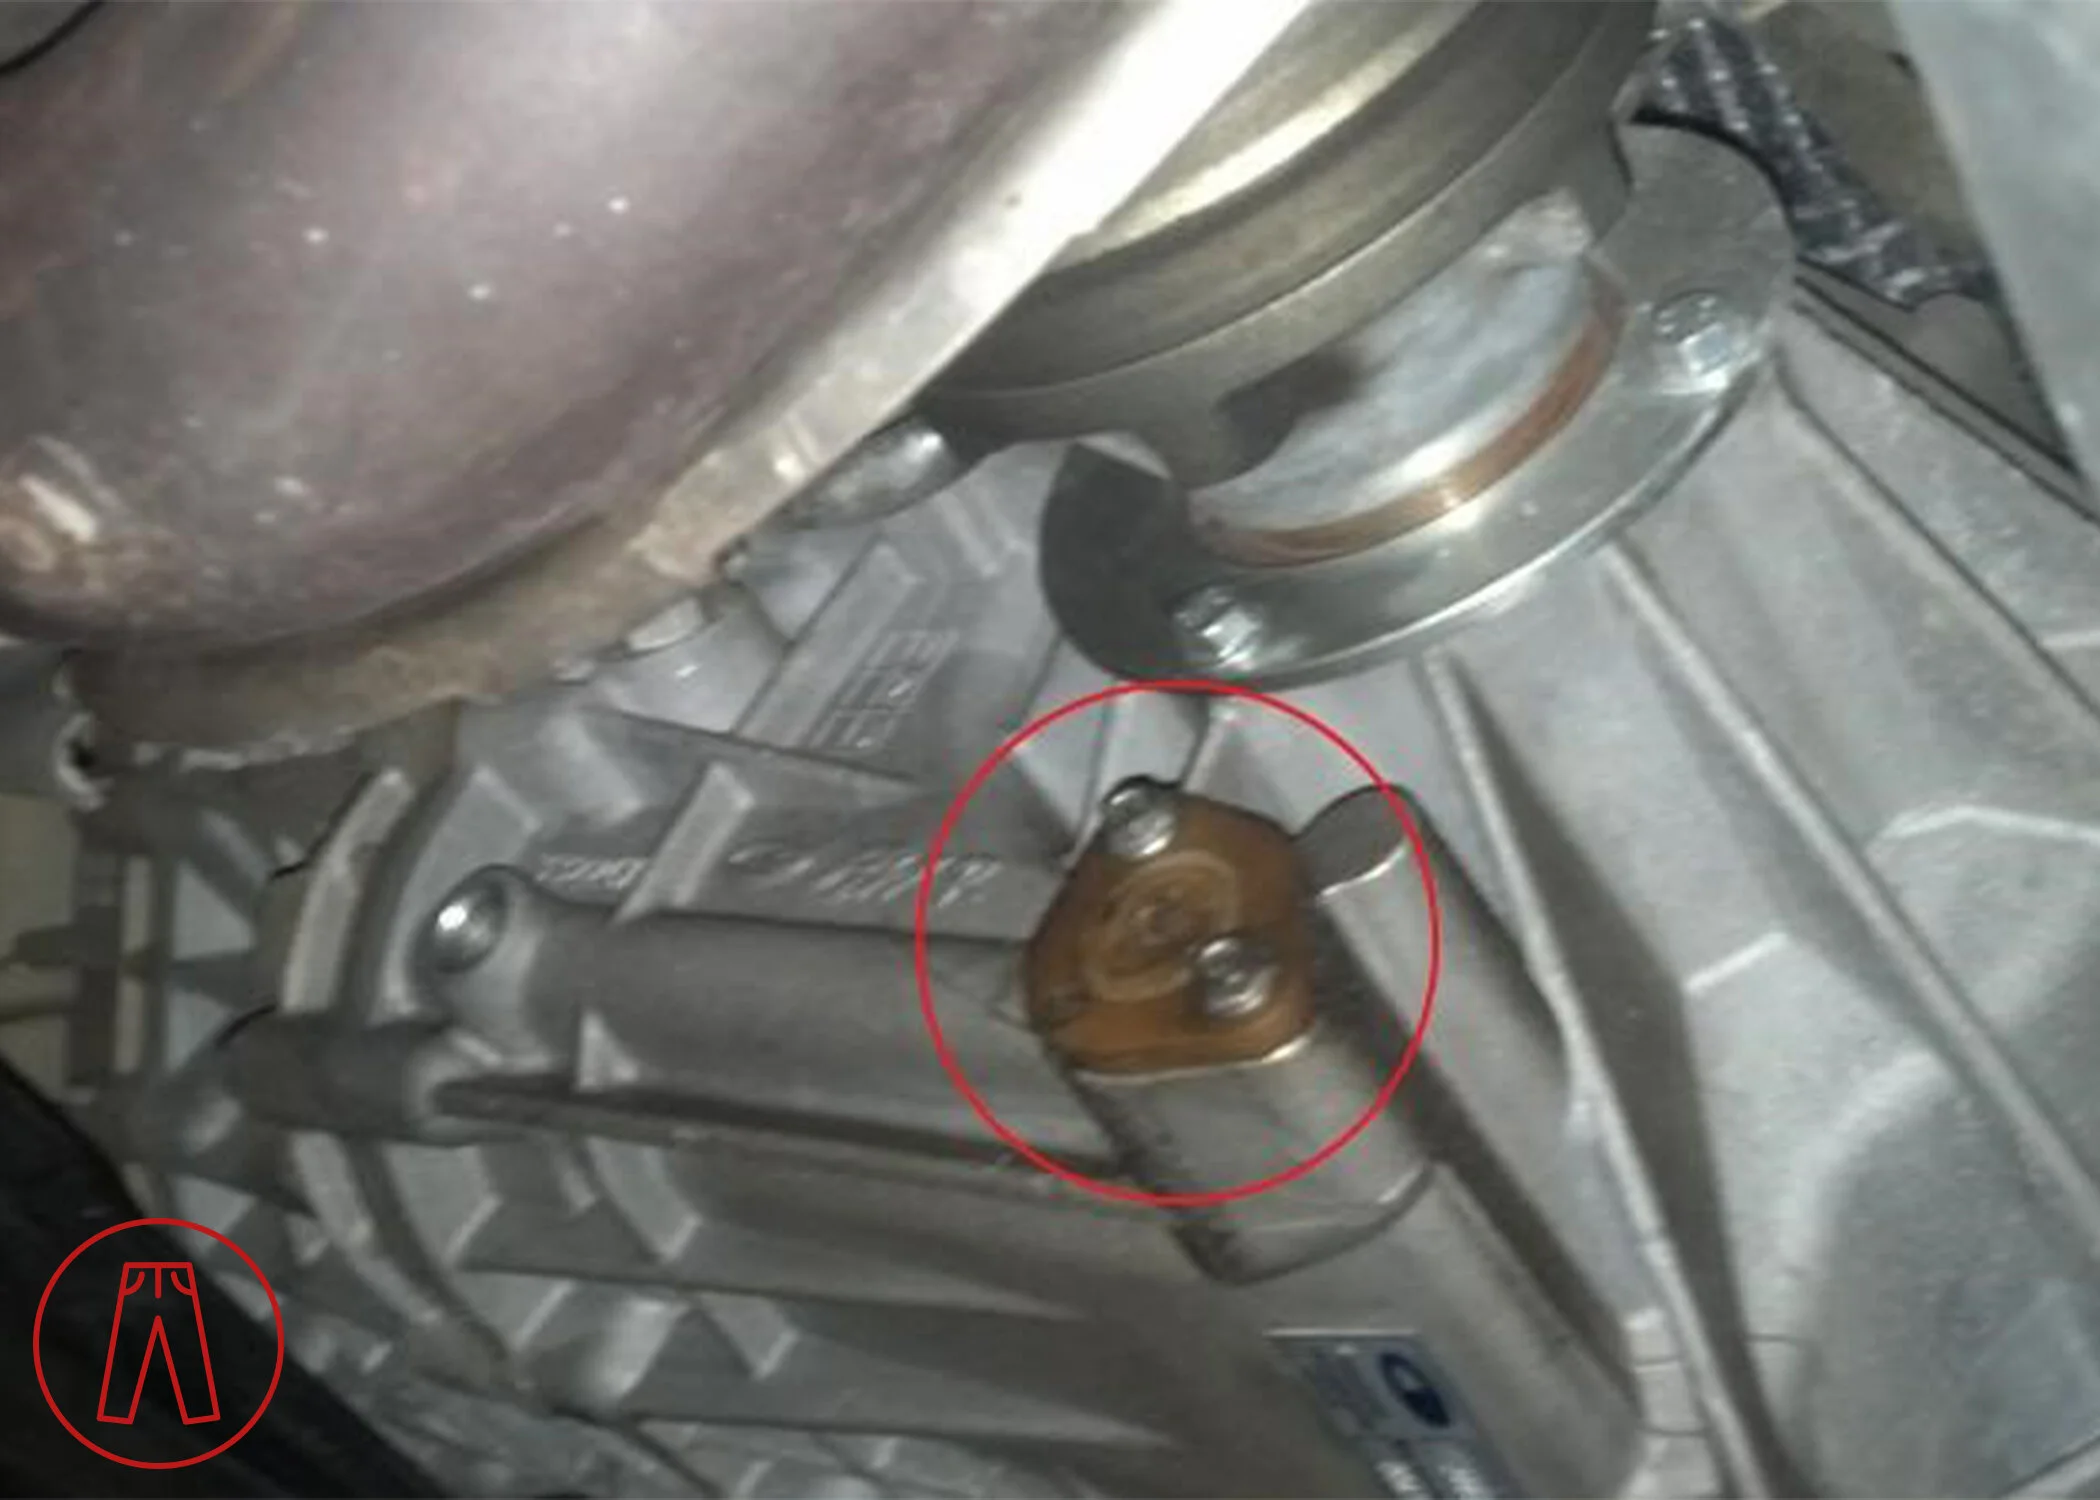
Use the 8mm socket to remove the bolts on the transmission filter (circled in red in the picture below). These bolts are not on tight and don't take much effort to loosen. Remember this when reinstalling the filter. Do not pry the filter out!! It is made of plastic and can easily break! I used a very small flat-head screwdriver to very gently break the seal of the O-ring keeping the filter in place. Once the O-ring pops free of the housing, the filter comes out easily. Gear oil will come out so be ready to clean it up.
This is what the filter looks like when it’s pulled out. It’s reusable so you just need to clean it. Same as the drain plug, you’ll want to clean it in a way that won’t contaminate the gear oil when it’s put back into the transmission.

Step 6
Clean up any remnant gear oil from the transmission filter and then reinstall it using a new O-ring. Do the same with the drain plug while using a new washer. I sell both of these (and the copper washer for the fill plug) together as my Gear Oil Change Package.
Step 7
Fill the transmission! Gear oil bottles often have long spouts to make it easier to pour the gear oil into the transmission. That’s the case with both the Castrol BOT270A and Motul Gear 300 that I sell in my online store. They may not look like it at first, but the nozzles actually pull out of the bottle. Here’s the nozzle pulled out of the Castrol bottle:

You can stick the bottle straight through from the side - basically approach the hole with the bottle horizontal (on its side) and there’s a clear path directly into the fill plug hole. You’ll want to do it a little quickly so not much gear oil comes out of the bottle before you get the nozzle into the transmission.
Once the gear oil starts coming out of the fill plug hole, the transmission is full. Clean up the fill plug hole and reinstall the fill plug using a new washer.
Step 8
Double check to make sure everything is sealed up and nothing is leaking, then reinstall the rear undertray.
And that’s it!