
Bluetooth Switcher Replacement DIY Guide
DISCLAIMER
As always, follow all safety protocols. Don't undertake this task if you aren't comfortable with it, fully understand it, and are capable of completing it. The information provided may be incomplete or inaccurate. You are ultimately responsible for anything you do. Neither Redpants, LLC or myself is responsible or liable for anything that may occur.
There's a weird problem with the V8 Vantage where the speakers on one side of the car stop working. There are a couple band-aid solutions: You can have your passenger kick the footrest on their side of the car, or you can "shock" the sound system by cranking the volume really loud for a split second. That's... a weird pair of solutions, right?
Well, it turns out that the problem might be the Bluetooth Switcher.
Still weird.
Here's a video of me discussing the module:
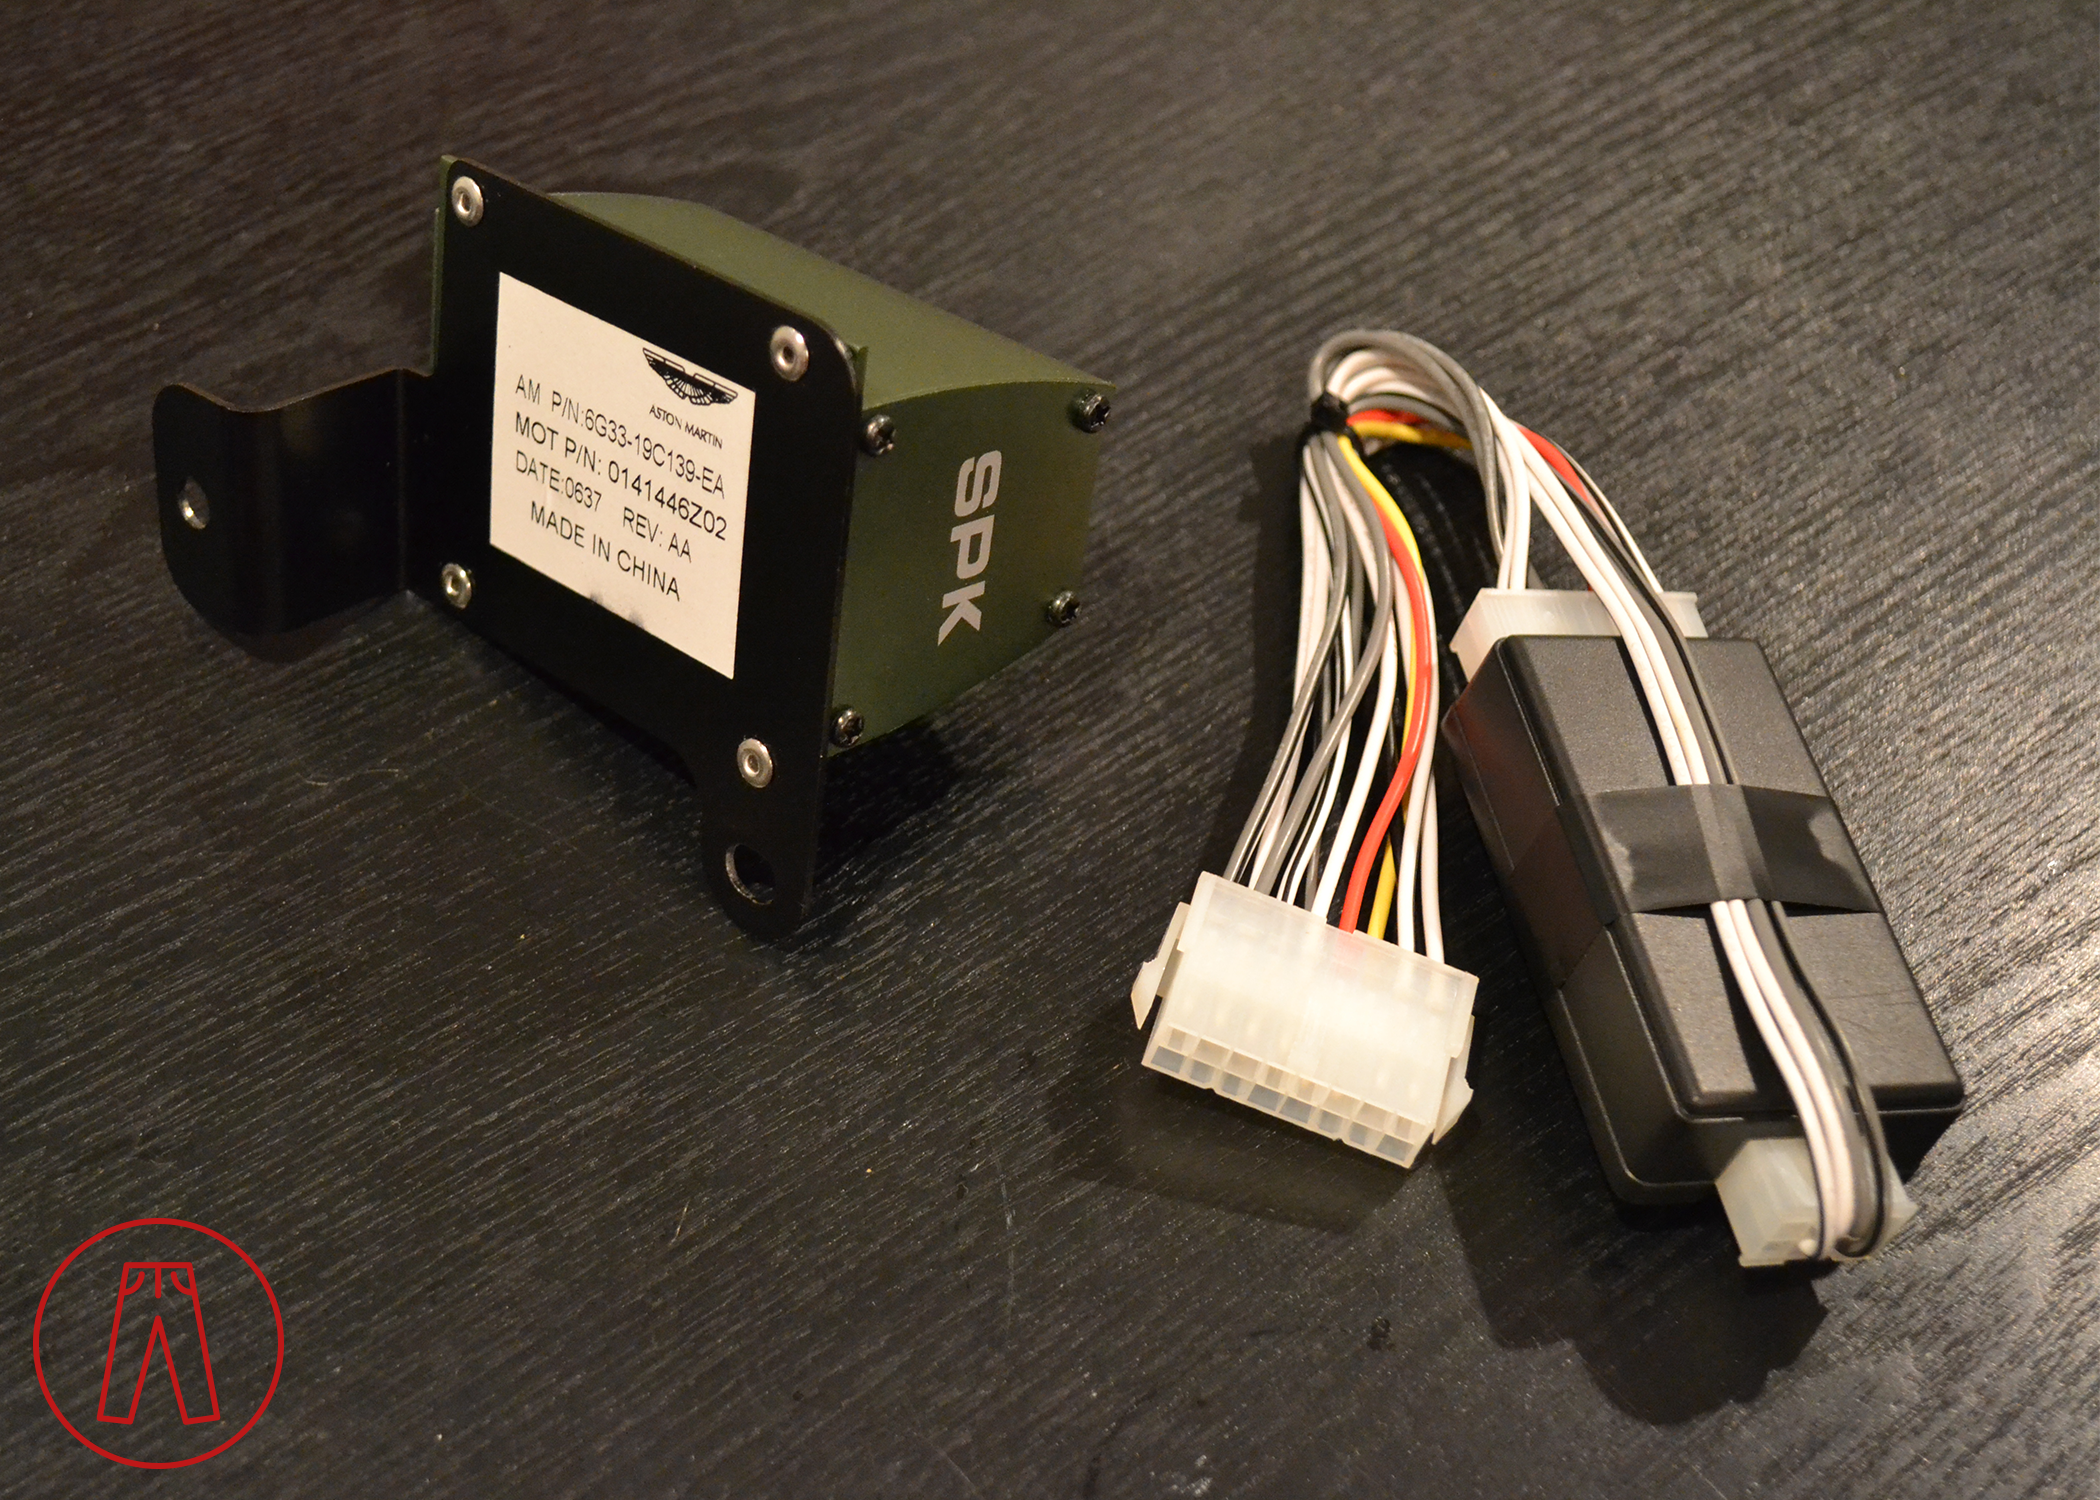
The Bluetooth Switcher is behind a panel under the passenger footrest, which explains why kicking it can temporarily fix it. But replacing it is the only way to fix it for good. The part has been updated a couple times since the V8 Vantage was first produced, and the current part looks nothing like the original. In fact, the “updated” one in the video thumbnail picture was replaced so that’s not even what the current one looks like.
Anyway, the good news is that you can just connect the new one and leave it in place without removing the old one. If you want to remove the old one, you can do that, too. But be warned... it's a pain and probably isn't worth it. I'll cover both in the steps below.
Needed
Bluetooth Switcher
T30 Torx bit
10mm deep socket
8mm socket
Extension (at least ~6-8")
Ratchet for the above
Double-sided tape
About half an hour
Note: If you’re leaving the old Bluetooth Switcher in place, you only need the new Bluetooth Switcher, T30 Torx bit, ratchet, and double-sided tape. You do not need the 10mm or 8mm sockets or the extension for them, as these are only needed if removing the original Bluetooth Switcher.
Before you begin
Removing the original Bluetooth Switcher will likely result in padding material being damaged or destroyed. I don’t recommend removing the original Bluetooth Switcher unless you’re ready to do a lot more work, including replacing or regluing padding which may rip during removal.
Step 1
Pull back the bottom carpet on the passenger side to expose the panel cover. Use the T30 Torx bit and ratchet to remove the 7 bolts holding the cover in place.

Remove the cover and you'll see the Bluetooth Switcher at the bottom of the opening. It's the green metal box.
Unplug the Bluetooth Switcher. The connector is on the right side.

Step 2
Steps 2 through 6 are for the removal of the original Bluetooth Switcher. If you’re leaving the original Bluetooth Switcher in place, skip down to Step 7.
Pull back the carpet nearest the door to expose the two T30 Torx bolts, then remove those bolts.
See how the metal panel goes under the white padding? The padding is glued in place. Removing the metal panel will tear the padding. I warned you!

Step 3
Pull back the carpet against the transmission tunnel to expose the 10mm nut, circled in the picture below. Use the 10mm socket to remove it.
See that narrow strip of carpet? It's glued in place. You'll be tearing apart the glue (the carpet will be fine) when you pull the metal panel out.

Step 4
Use the 10mm socket, long extension, and ratchet to remove the two 10mm nuts at the top side of the aluminum panel. You should have far fewer wires in this area than I have (I've got an aftermarket setup going on in there).


Step 5
Pull back the foam padding at the bottom of passenger foot area to expose the three Torx bolts at the bottom edge of the panel. Use the T30 Torx bit to remove them.

Step 6
If you want to remove the panel entirely, have at it. Remember that the side against the transmission tunnel had a nut that faced up, so you have to lift that side up as you pull it toward you. And don't forget where the carpet is glued into place there, and the white pad on the other side. However, instead of actually removing it, you can pull up on it while moving the ratchet into place and work the ratchets below the panel.
Either way, use the deep 10mm socket to remove the bolt on the right side, and use the 8mm socket to remove the bolt on the left side. Now you can pull out the original Bluetooth Switcher.
Step 7
Plug in the new Bluetooth Switcher. Test your audio system to make sure it works. If everything sounds good, you can use the double-sided tape to stick the new Bluetooth Switcher in place, then button everything up using the steps above in reverse.
And that’s it!