

V8 Vantage PCV Valve Replacement DIY Guide
DISCLAIMER
As always, follow all safety protocols. Don't undertake this task if you aren't comfortable with it, fully understand it, and are capable of completing it. The information provided may be incomplete or inaccurate. You are ultimately responsible for anything you do. Neither Redpants, LLC or myself is responsible or liable for anything that may occur.
The positive crankcase ventilation (PCV) valve is a small but incredibly important part of your engine. It’s job is to vent off excess pressure from inside the engine’s crankcase. Without it, pressure would build up inside the engine casing and could lead to catastrophic damage. Although it’s a rarely-discussed part of your engine, it’s actually something of a maintenance item for the V8 Vantage. The PCV may need to be replaced as often as every 40,000 miles depending on climate and driving conditions.
A bad PCV often emits a buzzing sound when your engine is idling. It’s not guaranteed it’ll buzz when bad, but it’s an easy diagnosis if you hear a buzz. Just push down on the center of the PCV with your finger - if the buzzing changes or stops, you know it’s the PCV causing the buzz and the PCV needs to be replaced.
Needed
New PCV Valve
8mm socket
Ratchet
About 15 minutes
Before you begin
The PCV valve is easy to find: it’s the plastic assembly with the round, flat top next to the intake inlet. In the pic below, you can see that I have one of my catch can kits on the car. The hoses and catch can replace the OEM plastic hose that would otherwise be there.

Step 1
Disconnect the hose that sits on top of the PCV valve and the hose that connects into the side of the PCV valve. I’ve circled the connectors for each hose in the picture below.

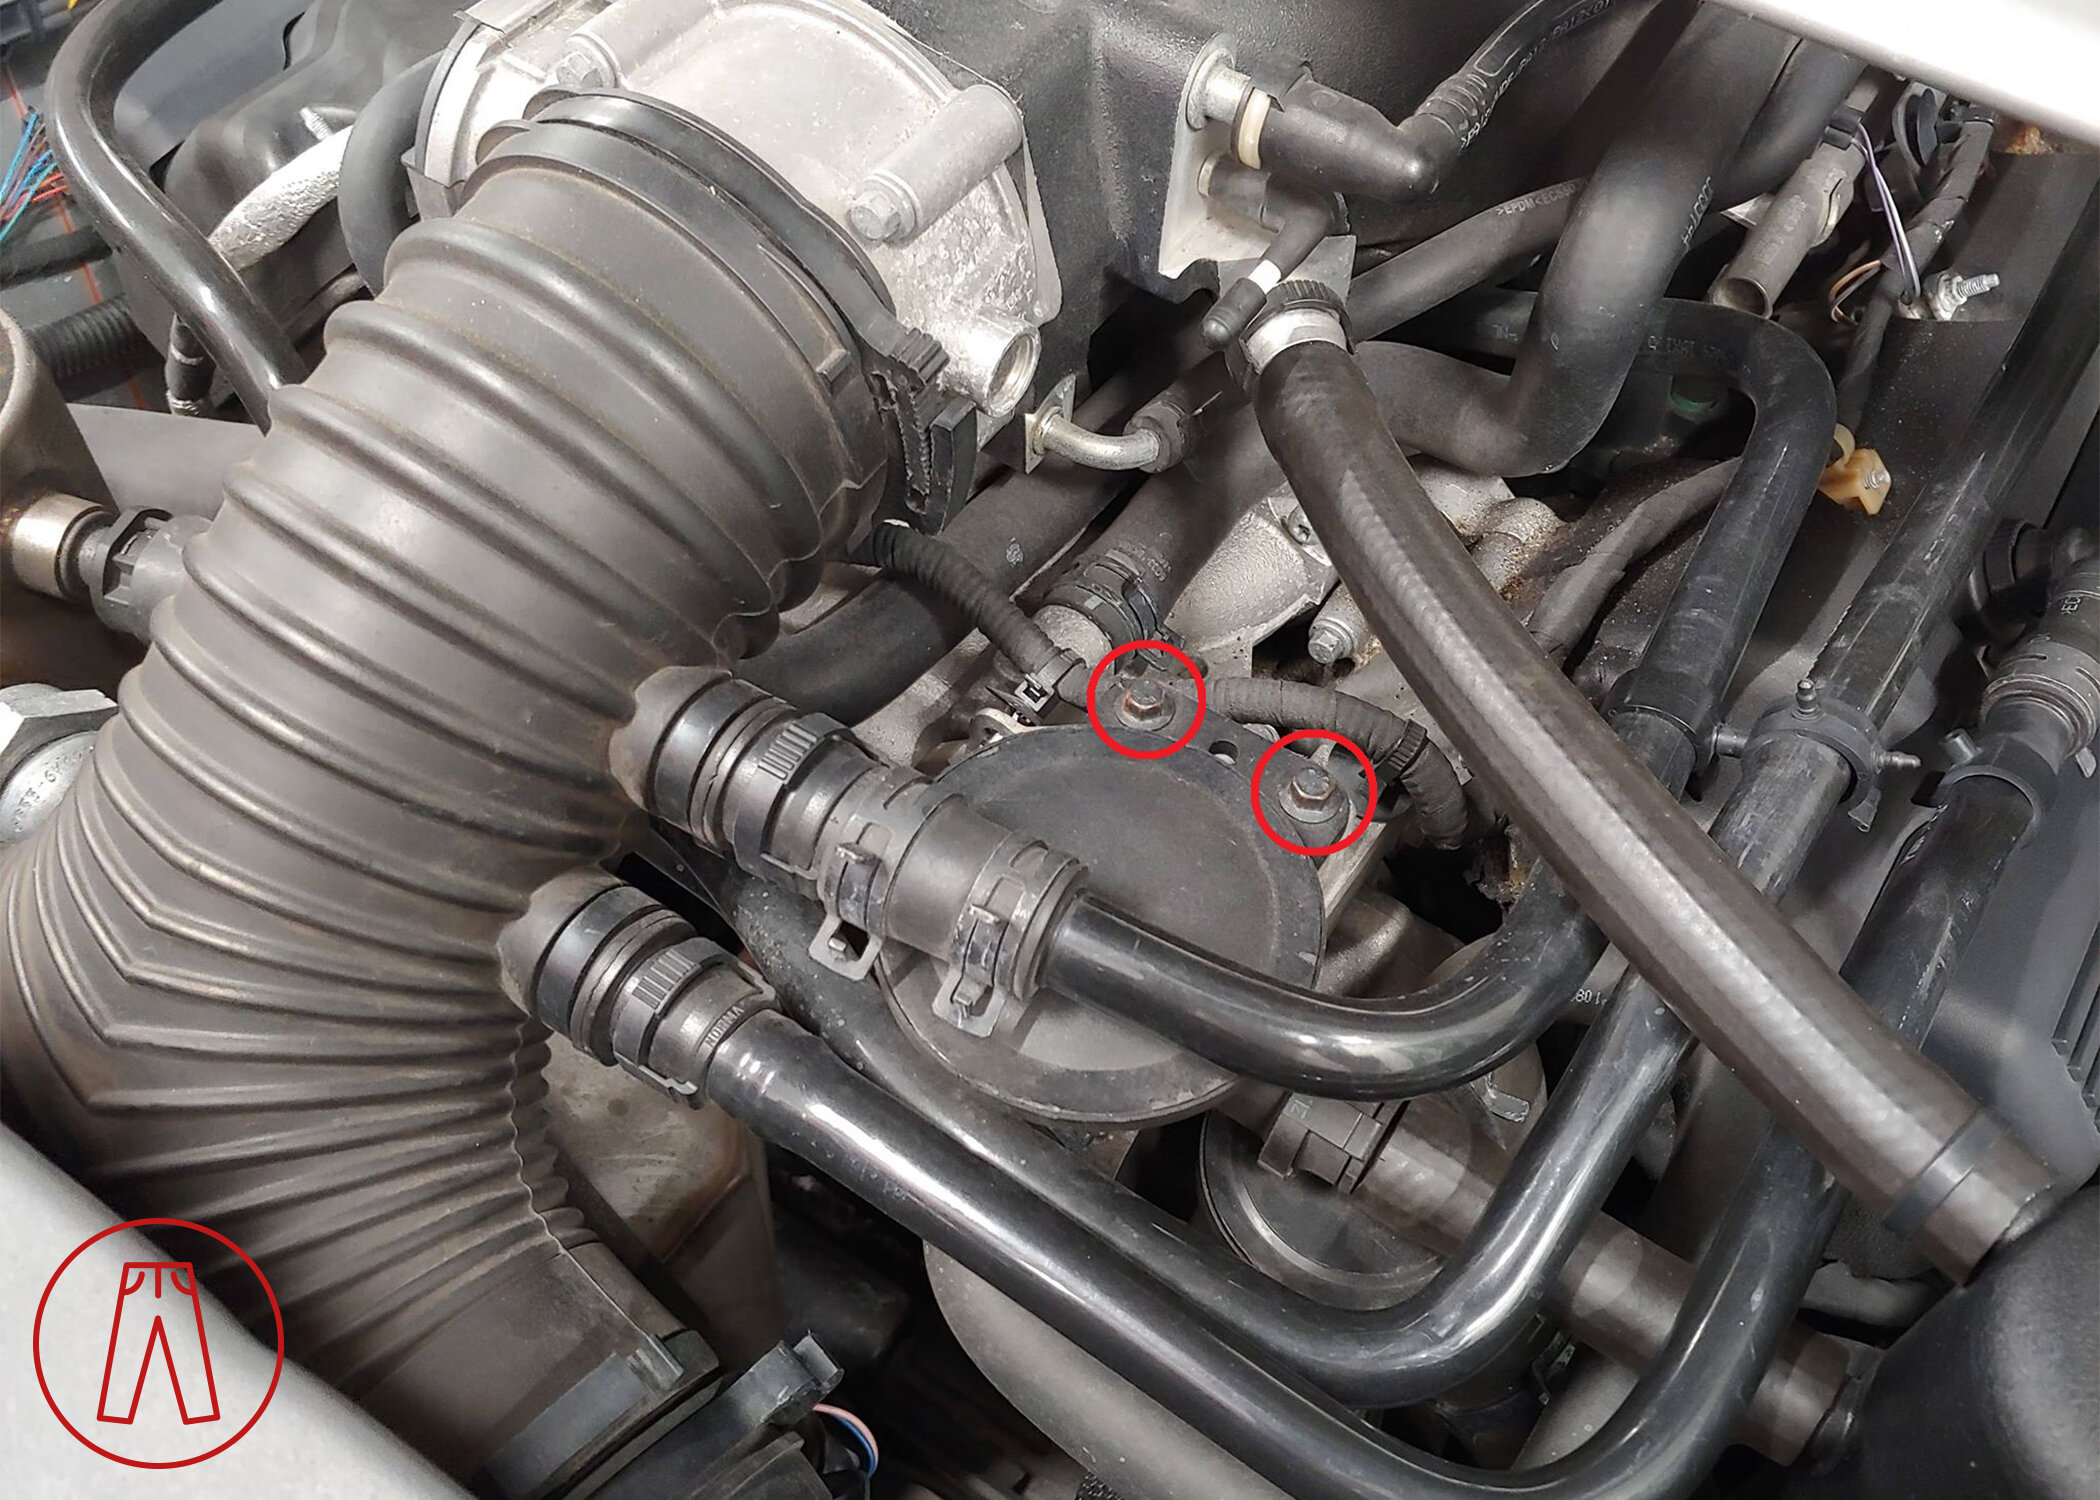
Step 2
Use the ratchet and 8mm socket to remove the two bolts that hold the PCV valve in place. They’re circled in the pic below.
Step 3
Pull up on the PCV valve to remove it from the engine. There’s an O-ring that’s holding it in place on the underside, so it may help to twist the PCV valve while pulling up on it. Be careful that it may ‘pop’ loose quickly!
Step 4
Clean any spilled oil and then install the new PCV valve by following the steps above in reverse order.